|
| OO Scale | N Scale | G Scale | Z Scale | HO Scale | Slot Cars & R⁄C |
| |||||||
|
|||||||
| Home Page | |||||||
| BUY GIFT VOUCHERS | |||||||
| Products | |||||||
| Latest News | |||||||
| RIGHT LINES | |||||||
| Bargains | |||||||
| Downloads | |||||||
| Events | |||||||
| Careers & Jobs | |||||||
| Carriage Services | |||||||
| About Us | |||||||
| Contact Us | |||||||
| Pay Us A Visit | |||||||
| Meet The Staff | |||||||
| Links | |||||||

| SHOPPING BASKET |
Your shopping basket is empty. To add an item, click the "Buy" button
| YOUR ACCOUNT | ||
|
||||
 |
||||
| Prodigy Advance Digital System |
||||
| Cased Controllers |
||||
| Panel Mount Controllers |
||||
| Walkabout Controllers |
||||
| Modules & Transformers |
||||
| Scenics & Accessories |
||||
| Wiring & Electrical Components |
||||
| Tiny Signs | ||||
| Tools | ||||
 |
||||
| RECENTLY VIEWED |
| N07343 - Dark Green Structure Foam 5mm (15g) | ||
| PR28136 - Couple Standing Figure | ||
| ODNQ1007 - Q1 BUT Trolleybus Cardiff (Streamline) | ||
| ODNFT034 - Ford Transit MkV Van Parcelforce | ||
| OD76SHL06WF - Stobart Lorry Tony McCoy | ||
| More ›› |
| O Scale | Wargaming | Architectural | Narrow Gauge | Tools+ | ||

Building the GM414 Fordhampton Bridge

TERRY SMITH shows us how to add this plastic kit to your model railway.
In this installment we will show you how to best incorporate one of our latest additions to our Fordhampton range into your layout.
Firstly we will dispense with the usual 'how it goes together' section as this is a very straightforward kit to build - the curved arches attach to the two sides, and a one-piece moulding which holds the track sits on the top.
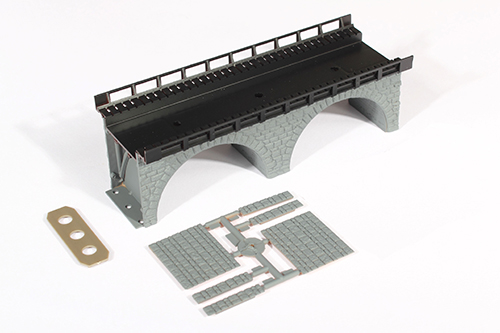
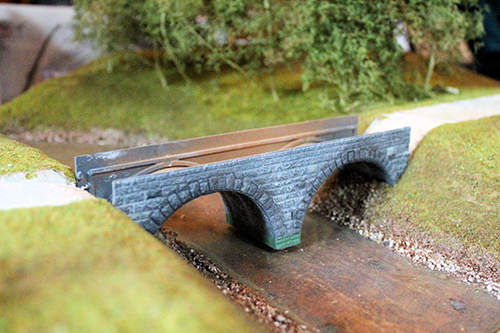
The assembled Fordhampton Bridge kit GM414
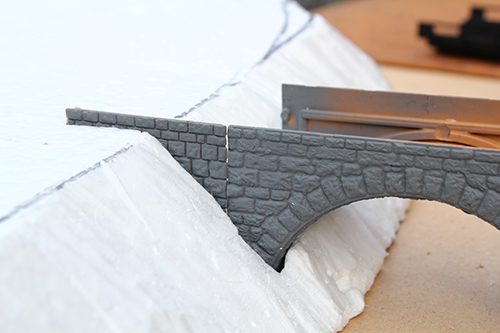
What we want to show you is just one of the many ways the bridge can be modelled in a prototypical setting. Most importantly you must create a reason for the bridge to be there so that the location seems natural (and credible). This generally means raising the track - or does it? One of the best ways to model a bridge like this is to drop an area of the baseboard to create a gap for the track to cross it. Of course, the other option is to raise the track up with a gentle as practical incline, and then incorporate your bridge into whatever it is you want to cross. Either way, the modelling techniques shown here would be the same.
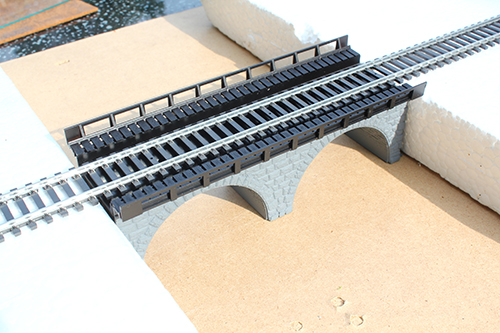
In the above picture you can see a rudimentary small valley created by polystyrene sheeting with the bridge placed between, but apart from where rivers pass through towns this is not very natural looking.
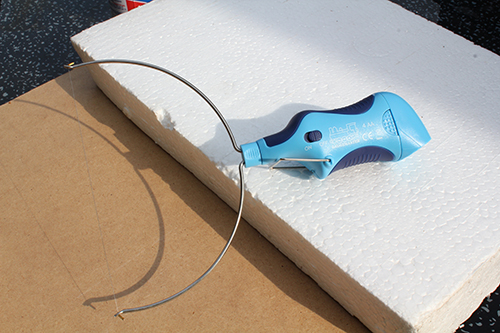
This is where a tool such as the GM622 Hot Wire Cutter comes in handy. With a little practice you will be able use the tool to cut nice shapes into the polystyrene, shaping it into the sloping banks of a river, like in the shot below.
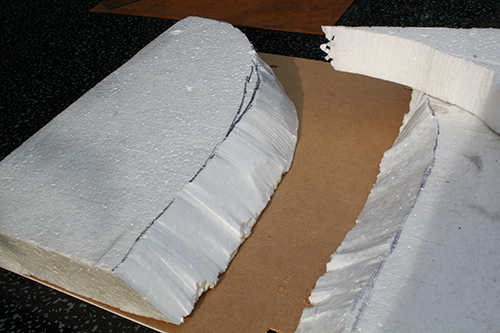
Notice in this picture how much narrower the proposed river will be, now we have cut the slopes. If one wished to have more of an imposing river then you could always add another bridge kit to give you added width.
Now things are starting to come together as you cut slots into the polystyrene to take the bridge.

Various techniques can be used for creating water effects but in this case, I used a quick and easy way to obtain the effect I was after. What you see here is a dissembled glass picture frame and has luck would have it the brown leatherette finish on the frames backing was used to good effect as the river bed. I just painted onto it a few grey rocks and some green streaks to represent weeds then sprayed the edges with matt brown paint to give the river edge a muddy look. Once placed under the glass I think it came out reasonably well.
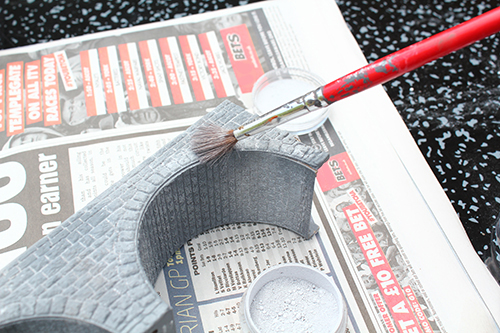
Now we have the positioning of the bridge sorted on the layout, lets turn to the model itself to see if we can make it look a little more realistic. The kit comes moulded in a nice stone-grey plastic, so you dont have to paint it, but by using some weathering powders you can improve the look no end. A light grey was first applied using a paint brush then rubbed in with your fingers to represent mortar.
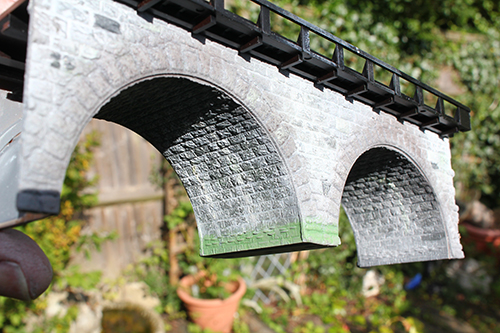
A very dark grey powder was then applied to the arch stones, while other stones on the sides were picked out with paint in lighter and darker shades of grey to give variation - finally with white paint some limescale streaks were applied to the underside of the arches.
The now decorated and weathered bridge was then placed into its new home on the layout. Note that in the above picture this could easily be an occupational bridge carrying a farm track across a stream or indeed even turned into a road bridge if desired. Another option would be to reduce the height of the bridge by up to 50% and using it to transverse a marsh like terrain use your imagination.
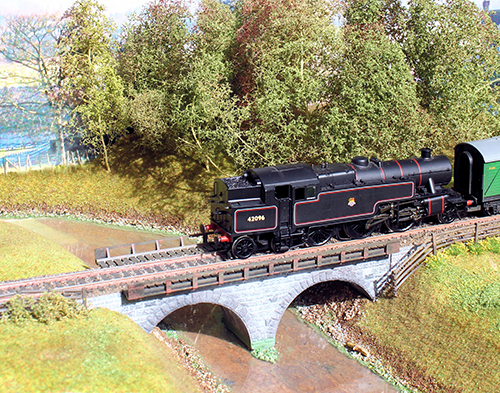
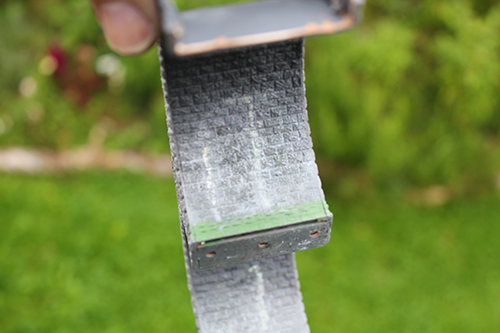
With the top placed on the bridge and the hand rails suitably painted in places with a dark rust, it serves its purpose as it crosses a stream on a branch line just north of the town of Fordhampton!
|


We are always looking to make improvements to our website to try and improve the quality of your visit. We would welcome your feedback and suggestions, so please do not hesitate to e-mail our webmaster with your comments. Alternatively call us on 01903 884488.
Home Cookies Privacy Statement Terms & Conditions Site Map Site Guide
WEEE Regulations Glossary Careers & Jobs
Tel – +44 (0) 1903 884488 Fax – +44 (0) 1903 884377 E-Mail us – click here
Gaugemaster.com is a trading name of Gaugemaster Controls Ltd.
Registered in England No. 2714470, Registered office:
Gaugemaster House, Ford Road
Arundel, West Sussex, BN18 0BN, United Kingdom
VAT Reg. No. 587 8089 71
Copyright © 2003-2014 Gaugemaster Controls Ltd. All Rights Reserved.