|
| OO Scale | N Scale | G Scale | Z Scale | HO Scale | Slot Cars & R⁄C |
| |||||||
|
|||||||
| Home Page | |||||||
| BUY GIFT VOUCHERS | |||||||
| Products | |||||||
| Latest News | |||||||
| RIGHT LINES | |||||||
| Bargains | |||||||
| Downloads | |||||||
| Events | |||||||
| Careers & Jobs | |||||||
| Carriage Services | |||||||
| About Us | |||||||
| Contact Us | |||||||
| Pay Us A Visit | |||||||
| Meet The Staff | |||||||
| Links | |||||||

| SHOPPING BASKET |
Your shopping basket is empty. To add an item, click the "Buy" button
| YOUR ACCOUNT | ||
|
||||
 |
||||
| Prodigy Advance Digital System |
||||
| Cased Controllers |
||||
| Panel Mount Controllers |
||||
| Walkabout Controllers |
||||
| Modules & Transformers |
||||
| Scenics & Accessories |
||||
| Wiring & Electrical Components |
||||
| Tiny Signs | ||||
| Tools | ||||
 |
||||
| RECENTLY VIEWED |
| PR45212 - Hand Cart/Barrow/Tools Kit | ||
| N12800 - On the Platform Sound Scene | ||
| MN89835 - Locomotive Roundhouse Kit | ||
| ODNQ1007 - Q1 BUT Trolleybus Cardiff (Streamline) | ||
| PR28136 - Couple Standing Figure | ||
| More ›› |
| O Scale | Wargaming | Architectural | Narrow Gauge | Tools+ | ||
Building Wagon Kits

WARREN KERFOOT gets building with a Parkside Dundas OO Scale Kit
With the increasing price of some of the ready-to-run models, and in some cases the absence of those specific or interesting diagrams of models you'd like - consider doing some kitbuilding!
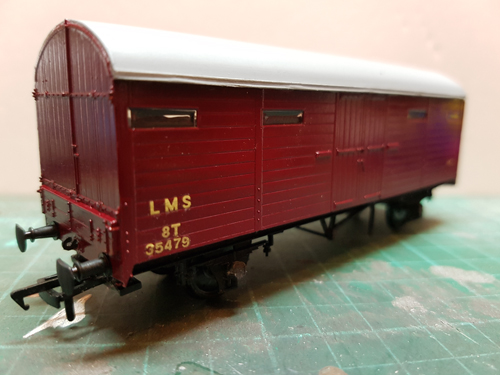
For a project on the layout I was looking to have a rake of different CCT (or Covered Carriage Trucks to give them their full title). For this I have first chosen, the Parkside Dundas OO Gauge PC33 kit for the 4 wheel CCT which depicts Diag 1929 of the LMS fleet, and saw service right up to the 1970s I believe. The vehicles themselves were rated at 8 tons and were used for mail, parcels and vehicle transport on express workings.
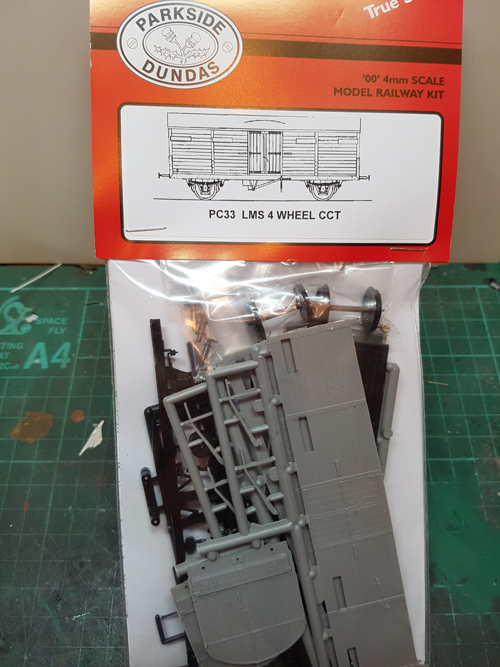
The kit is well moulded and very handily, comes with wheels and brass buffers - plus decent instructions and a small amount of history and livery information. In fact the only things you will need are paint, decals and couplings to suit you.
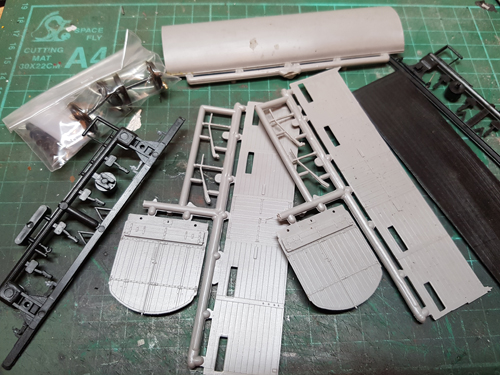
Opening the kit gives you the underframe items in black plastic and the superstructure in grey. It will seem the most obvious thing to say straight away, but have a good look at the bits and get to grips with how it actually goes together, before the glue gets anywhere near it! The kit has some minor flash to carefully clean up with a craft knife, and make sure you get the inner joint faces nice and tidy as these will really mess up getting the model square as you build it up. One thing which needs really care is the roof. For production reasons the injection moulding is done along one side's gutter line, so trim back carefully a bit at a time or you'll end up with one side looking neat and straight and the other looking like you got the dog to chew it off for you.
Read the instructions to formulate construction. I found building the body sides and ends with the floor as one unit (which could then be painted and left to cure) before adding the solebar and underframes was best, and pretty much as Parkside say in the instructions.
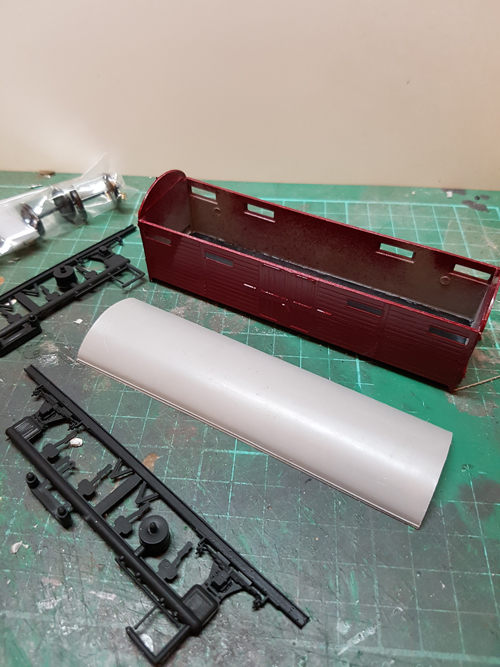
I much prefer spray painting, it's so much easier, quicker, accurate and above all, authentic looking than I can achieve with a brush. I first primed the body with Humbrol Primer and then used Crimson for the finish colour. It takes a bit of time to dry but it's well worth waiting for. While you're waiting you can spray the underframe sections with Humbrol Matt Black which dries really quickly. Then fit the pinpoint bearings for the Romford wheels supplied.
The bearing recesses need to be opened out gently, not too much or they will be sloppy in the mounting, but just as important is that they aren't too tight or you risk bursting the bearing cover. Once the body is cured through (I left it overnight) it's time for fitting the glazing needs to be done once the colour is on. A small piece of acetate is supplied and I cut this to fit in the recesses inside the body. The real vehicles had pretty much flush glazing and if you cheat and just bond your glazing to the inner sidewalls it'll look too deep.
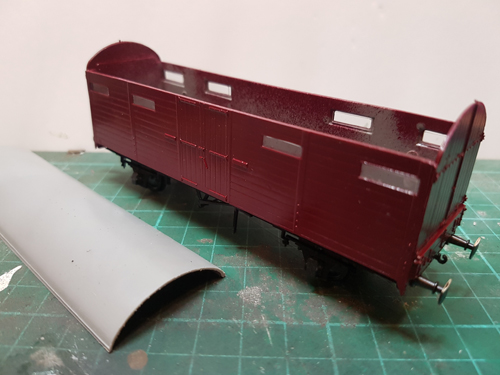
So now there's a painted body with windows in place it's time to add the underframe and brake gear which is all straightforward. Just remember to clean all the faces that meet with a quick flash over with a flat file. It'll improve the bond and keep things as square as possible. Within 5 minutes you have a rolling wagon!
Now add decals. You really can't go wrong with the HMRS range for the LMS/BR periods. I opted for the LMS coach style as it looks about right according the photographs I have. Only tricky part was the weight rating. I had to nick the 'T's off 'RESTAURANT' as there's nothing in the same style and colour for vehicle weight on the sheet!
Once the letters go on the model seems to look alive almost immediately. To add a bit more authenticity to the glazing I slid over a wave of Deluxe Materials Glue N Glaze. I love this stuff, it looks crystal clean and adds to the flush look.
Couplings are your next decision. Though if you're going for a 3 link coupling, I'd be tempted to do this before fitting the underframe as it's much easier to work on. As I don't mind tension locks (as long as they're not massive) I use the Parkside Dundas PA34 Mounting Blocks designed for the Bachmann B36-026 Couplings as opposed to the ones which actually come in the kit which look similar, but have the wrong spacing.
Finally add a bit of weight. I really like the self adhesive alloy wheel weights for this job, one placed over each axle. Then finish off by adding the roof. Again, take care with your glue on this job and use a precision applicator as you get with Revell Contacta Professional or Deluxe Materials DLAD-62 Plastic Kit Glue If you muck this final stage up it'll be in your line of sight... forever!
So there you have it. Something different, something you can add your own stamp to, something you can potentially save a few quid on too nowadays. So go on, take a look at the Parkside Dundas range and Dapol C series wagon kits and have a bash!
|


We are always looking to make improvements to our website to try and improve the quality of your visit. We would welcome your feedback and suggestions, so please do not hesitate to e-mail our webmaster with your comments. Alternatively call us on 01903 884488.
Home Cookies Privacy Statement Terms & Conditions Site Map Site Guide
WEEE Regulations Glossary Careers & Jobs
Tel – +44 (0) 1903 884488 Fax – +44 (0) 1903 884377 E-Mail us – click here
Gaugemaster.com is a trading name of Gaugemaster Controls Ltd.
Registered in England No. 2714470, Registered office:
Gaugemaster House, Ford Road
Arundel, West Sussex, BN18 0BN, United Kingdom
VAT Reg. No. 587 8089 71
Copyright © 2003-2014 Gaugemaster Controls Ltd. All Rights Reserved.