|
| OO Scale | N Scale | G Scale | Z Scale | HO Scale | Slot Cars & R⁄C |
| |||||||
|
|||||||
| Home Page | |||||||
| BUY GIFT VOUCHERS | |||||||
| Products | |||||||
| Latest News | |||||||
| RIGHT LINES | |||||||
| Bargains | |||||||
| Downloads | |||||||
| Events | |||||||
| Careers & Jobs | |||||||
| Carriage Services | |||||||
| About Us | |||||||
| Contact Us | |||||||
| Pay Us A Visit | |||||||
| Meet The Staff | |||||||
| Links | |||||||

| SHOPPING BASKET |
Your shopping basket is empty. To add an item, click the "Buy" button
| YOUR ACCOUNT | ||
|
||||
 |
||||
| Prodigy Advance Digital System |
||||
| Cased Controllers |
||||
| Panel Mount Controllers |
||||
| Walkabout Controllers |
||||
| Modules & Transformers |
||||
| Scenics & Accessories |
||||
| Wiring & Electrical Components |
||||
| Tiny Signs | ||||
| Tools | ||||
 |
||||
| RECENTLY VIEWED |
| GM2210201 - Class 73 E6003 BR Green | ||
| OD76SHL06WF - Stobart Lorry Tony McCoy | ||
| OD76ATV008 - Austin ATV Newcastle & Gateshead Fire Service | ||
| ODNFT034 - Ford Transit MkV Van Parcelforce | ||
| N07343 - Dark Green Structure Foam 5mm (15g) | ||
| More ›› |
| O Scale | Wargaming | Architectural | Narrow Gauge | Tools+ | ||
Expanding Your O Scale Layout
Part 4

TERRY SMITH looks at basic scenery and shows how even a flat coal yard can benefit from some undulations.
Hoping that I was going to start ballasting, I sprayed Humbrol AXD6029 Dark Earth close to the laid track sleepers so at least the ballast when applied would already have some earth colour underneath it next to the line.
I also gave the coal yard area a dusting of Humbrol AXD6033 Matt Black spray then it hit me how flat everything looked. I had contemplated on using 1/8th cork under the track but decided as this was a yard it wouldn't look right. In the actual yard itself the rails are pretty much level with any kind of road surface, but in the approach to the yard I decided to give the track a bit of a lift.
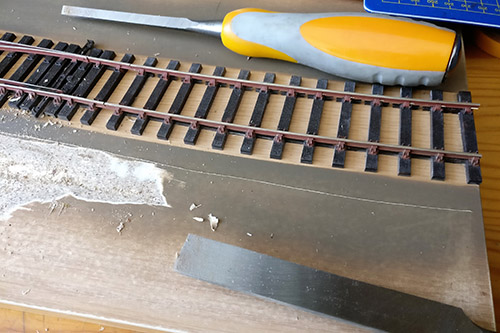
Initially I sprayed dark brown paint close to the track and then decided to chisel away the base board next to it.
The board used was 18mm MDF which was finished with a plastic wood effect, thick enough to carve into in places but still leave enough thickness for it to keep its integral strength. A quick trip down to a local DIY store and I returned with two nice new chisels at around 1/4" and 1" wide. Using the narrower of the two , I gouged out what at first looked like a drainage ditch. Once I started to use the wider one I just kept cutting into the board at around a 45 degree angle.
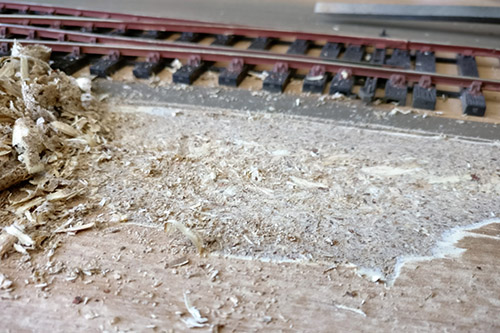
Once you start using the bigger chisel the ground really starts to drop away.
With the track lifted you can go to town, this is as far as I felt I needed but I am sure I could have gone deeper if I required.
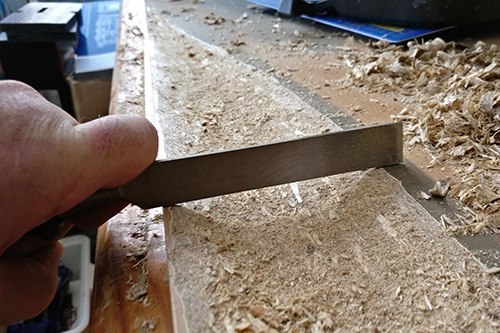
I didnt need to use a hammer, the new chisels were sharp enough to use with just the pressure from my hand. After looking at my initial handywork, I decided to cut into the baseboard in other places as well. I used a felt pen to draw out where features such as the roadway inside the yard was going to go and where I could also put dips in the surface to create ground variation.
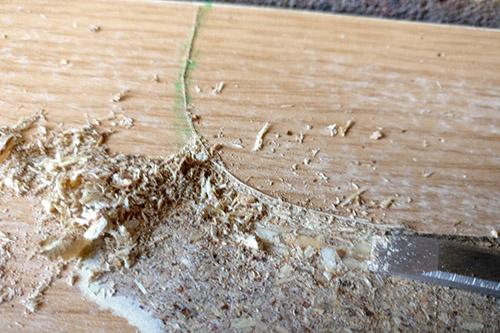
The chisel technique also lends itself to other areas of the layout, this is the curb near the yard's entrance. The roadway areas also benefit from having a curved shoulder cut into the top of the board.
At this point I decided as (a) this was going to get messy and (b) I didnt want to damage the track with an errant chisel, so I lifted all but the first piece of the Peco SETRACK. If you remember, I used DLAD-45 Roket Max adhesive to stick occasional sleepers to the board - with only the first piece being stuck firmly. A blade under the other glued sleepers was enough to break the bond. Now with the board almost clear of track I could really start to go to work, chiselling away to my heart's content.
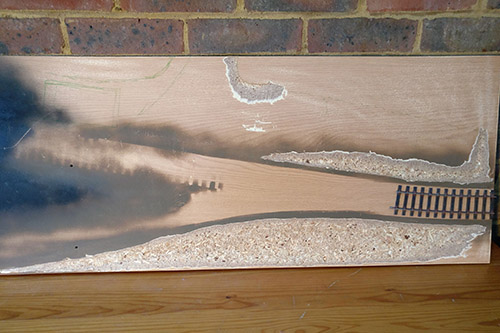
A quick look at where I had already cut away, made me realise that there was a lot more that could be done on this board to create undulations.
Once all of this had been done and the considerable mess cleared up, I then thought about how I could raise any parts of the layout, and for this I used my new best friend the Gaugemaster Balsa Bundle. By cutting out land mass shapes from the 1/4th thick wood, smaller 1/8th sections could then be stuck on top and sanded to create a natural contour, with a minimum coat of filler over the top.
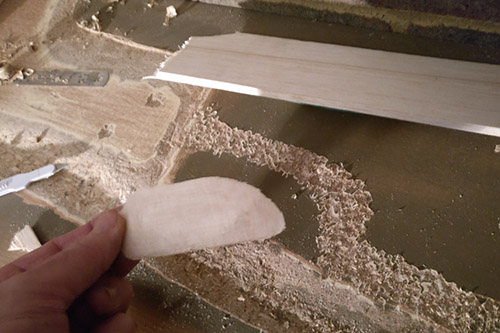
This piece of 1/4" balsa was cut to fit the area next to path. Once stuck in place it was given a light coating of filler and sanded to a natural contour.
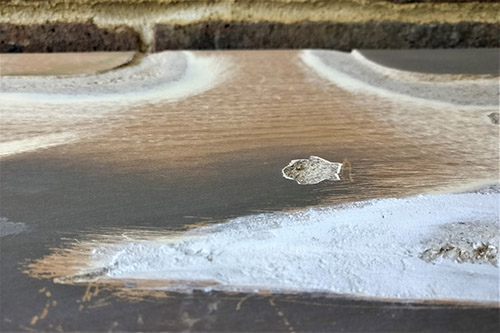
I always planned to have the ground rise up in the right rear corner of the tunnel end, but now my board has taken on some extra undulations to create a more realistic setting for the track.
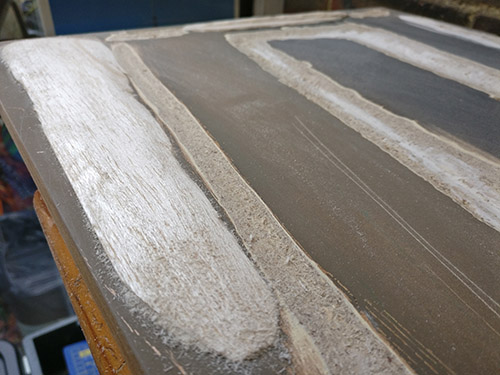
This shallow bank was made from 1/4" balsa with a 1/8th stuck on top and then sanded. Filler will be used to seamlessly blend this into the slope of the gully next to it.
This is the view looking towards the yards exit. The camber of the road has been carved with the chisels, all it needs now is a tarmac coloured paint finish note the pot holes, more on these next time.
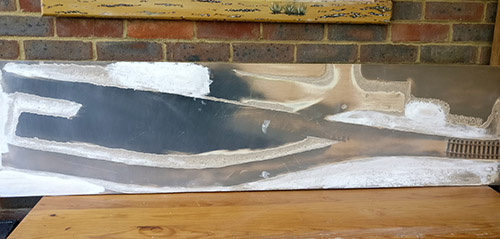
Compared to the image above after the first cut, now the whole layout has had the chisel treatment. The white areas are mainly where filler has been applied over balsa mounds.
Maybe in the next instalment I will get some track ballasted!
|


We are always looking to make improvements to our website to try and improve the quality of your visit. We would welcome your feedback and suggestions, so please do not hesitate to e-mail our webmaster with your comments. Alternatively call us on 01903 884488.
Home Cookies Privacy Statement Terms & Conditions Site Map Site Guide
WEEE Regulations Glossary Careers & Jobs
Tel – +44 (0) 1903 884488 Fax – +44 (0) 1903 884377 E-Mail us – click here
Gaugemaster.com is a trading name of Gaugemaster Controls Ltd.
Registered in England No. 2714470, Registered office:
Gaugemaster House, Ford Road
Arundel, West Sussex, BN18 0BN, United Kingdom
VAT Reg. No. 587 8089 71
Copyright © 2003-2014 Gaugemaster Controls Ltd. All Rights Reserved.