|
| OO Scale | N Scale | G Scale | Z Scale | HO Scale | Slot Cars & R⁄C |
| |||||||
|
|||||||
| Home Page | |||||||
| BUY GIFT VOUCHERS | |||||||
| Products | |||||||
| Latest News | |||||||
| RIGHT LINES | |||||||
| Bargains | |||||||
| Downloads | |||||||
| Events | |||||||
| Careers & Jobs | |||||||
| Carriage Services | |||||||
| About Us | |||||||
| Contact Us | |||||||
| Pay Us A Visit | |||||||
| Meet The Staff | |||||||
| Links | |||||||

| SHOPPING BASKET |
Your shopping basket is empty. To add an item, click the "Buy" button
| YOUR ACCOUNT | ||
|
||||
 |
||||
| Prodigy Advance Digital System |
||||
| Cased Controllers |
||||
| Panel Mount Controllers |
||||
| Walkabout Controllers |
||||
| Modules & Transformers |
||||
| Scenics & Accessories |
||||
| Wiring & Electrical Components |
||||
| Tiny Signs | ||||
| Tools | ||||
 |
||||
| O Scale | Wargaming | Architectural | Narrow Gauge | Tools+ | ||

Building an N Scale Farm Scene

MATT LOVELL shows us how to add a farm scene to your N Scale layout using Kestrel kits.
Following on from Jamess article about 'Corner Fillers' in the last issue of RIGHT LINES I thought I would look at one of the Kestrel kits items. The Farm Kit Set KD2003 provides you with four farm buildings ideal for filling in a small corner of a layout.
Being part of the Kestrel range it is great value whilst still having good detail on each kit. Instructions for most of the range of kits can be downloaded from our website. In this article I will explain how to build each kit and how they can be used to create a small farm scene suitable for the corner of the layout or as a centre piece.
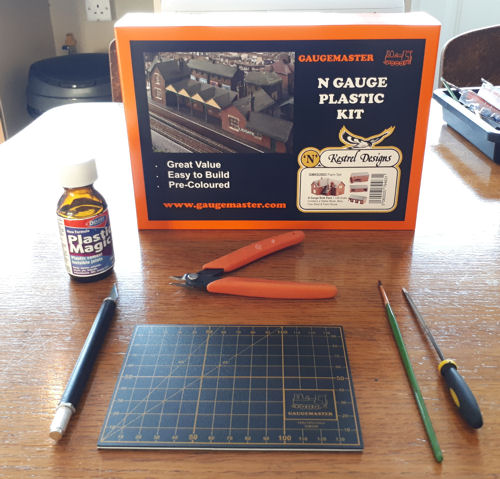
For this project I used several tools, glues and modelling aids.
- A small cutting mat (GM599)
- A Pair of Sprue Cutters (GM664)
- A Pot of Plastic Magic (DLAD-77)
- A Scalpel (GM614)
- A Small File (GM632)
- A Paint Brush (GM670)
The Unboxing
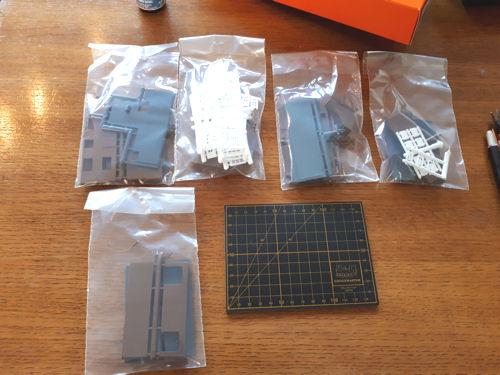
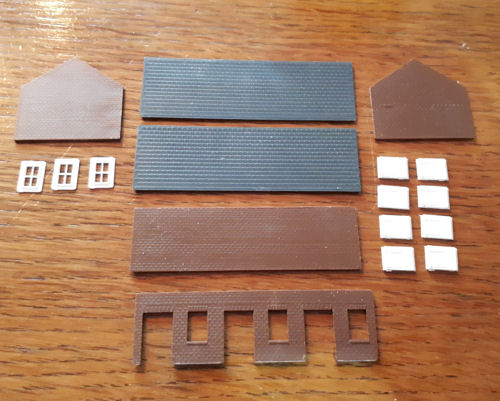
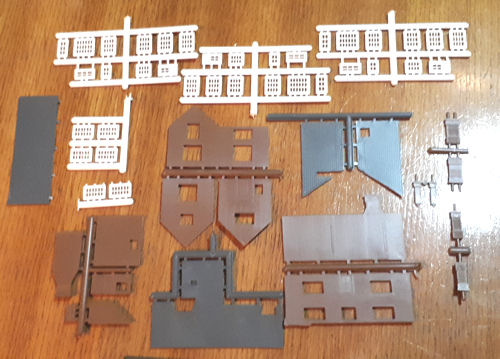
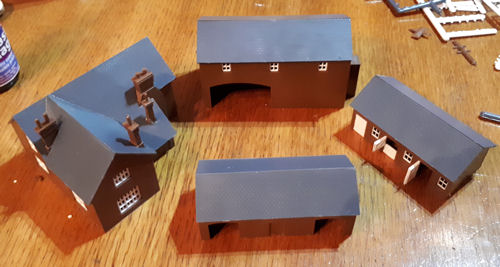
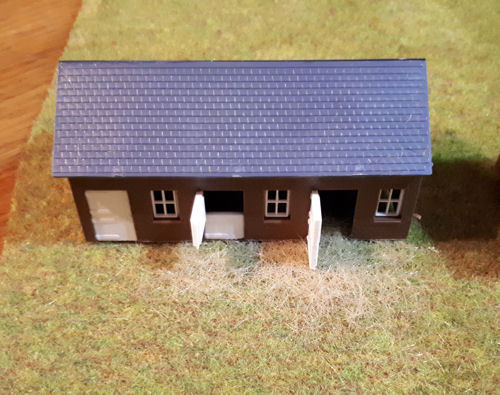
This set of kits includes four buildings which are also available separately; a stable block (GMKD34), a cow shed (GMKD35), a two story barn (GMKD36) and a farm house (GMKD37) each of which are moulded in coloured plastic, but can be painted as required.
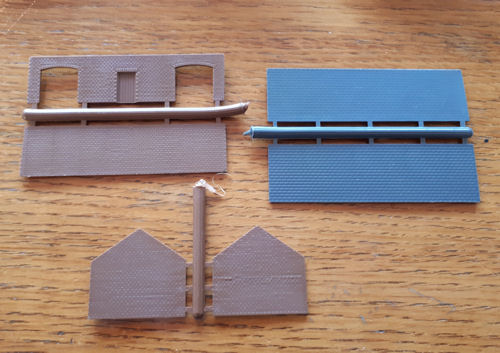
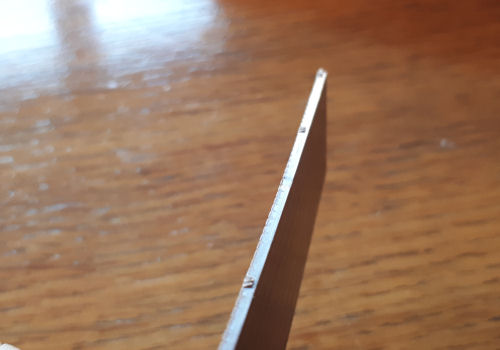
The first kit I put together was the cow shed because it was the quickest kit out of the four to construct. First you will need to separate the sprue from the kit parts, after separation you will need to file down the edges to get them flat and ready for sticking together.
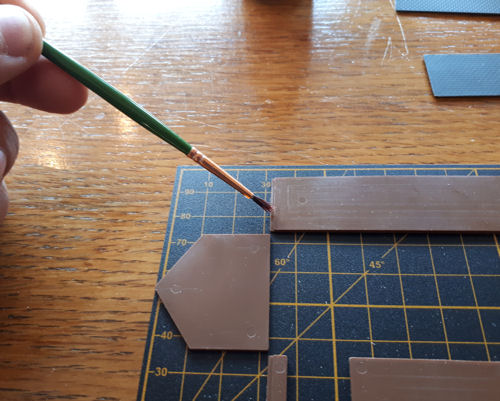
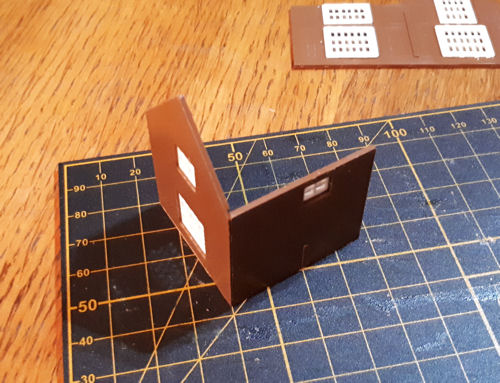
A small amount of Plastic magic was applied to the rear wall joint and corner of the side wall with the two being pressed together for a few seconds to allow the glue to dry. A bit more glue was added to the opposite end of the side wall and the front wall and pressed together to allow the glue to set. Lastly the opposite side wall was glued to the front and rear wall to form the outside structure.
Once the glue has completely dried the roof can be put on using the same method.

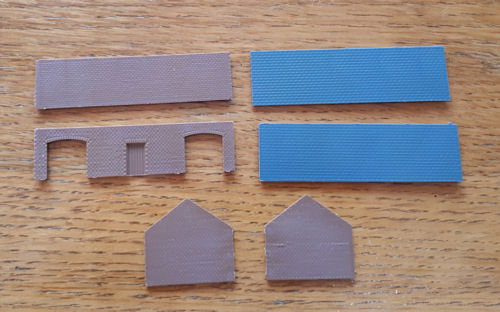
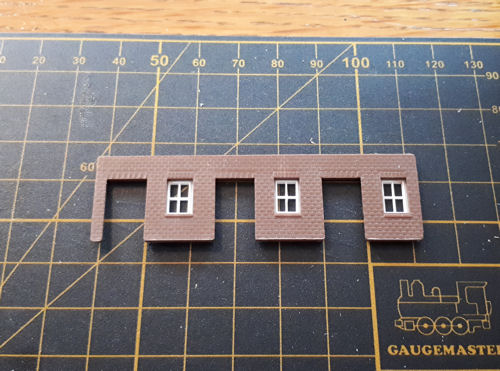
Now we can move on to the Stable as it is a similar size and construction to the Cow Shed, however you will need to glue the windows in first as it is easy to get to them while the walls are exposed.
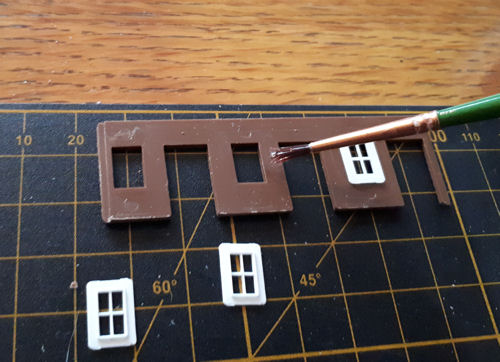
Apply a small amount of glue to the rear of the frame and place the window in facing outwards. Repeat this process until all the windows are in place.
The stable doors are a bit trickier and will need placing carefully to avoid ruining the look of the building. Start by deciding how many doors you want open as they will need to be glued in place before the rest of the building is constructed. You can either set the doors as fully closed, half open or fully open depending on your design.
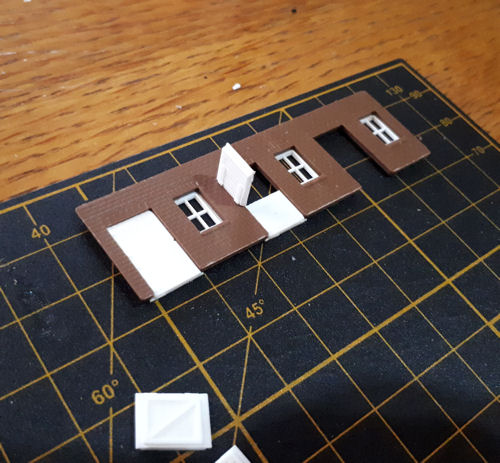
Once the doors are glued in place the rest of the structure can be built using the same methods as before starting with the rear and side walls.
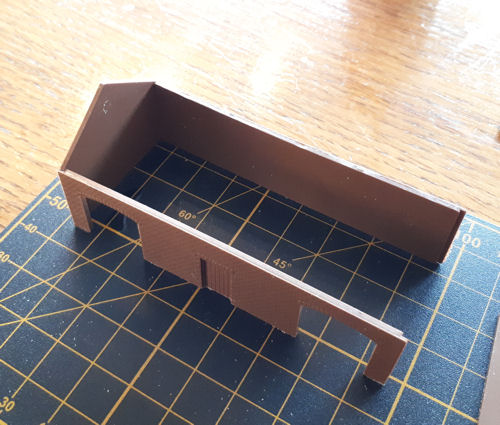
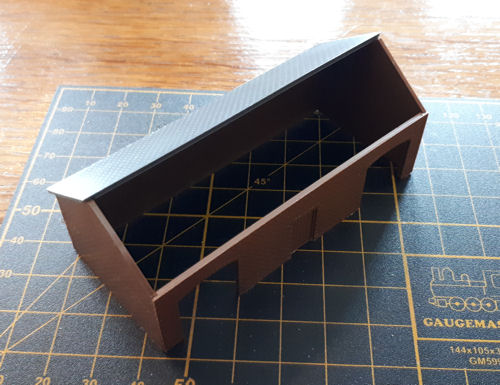
This is now the second building constructed so now we can move on to the Barn. This building is constructed in similar fashion to the other two, but you will notice that one of the side walls needs a set of steps attaching to enable access to the upper floor.
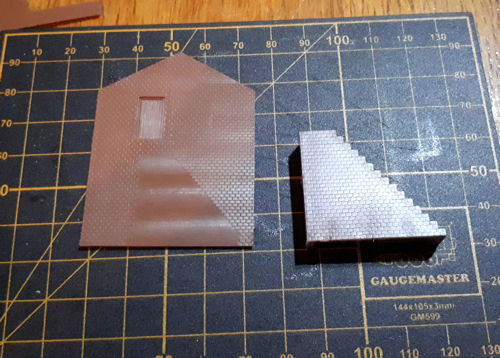
On one of the side walls you will see a smooth pattern which looks like the separate steps included in this pack, simply place the steps in position and add some glue to the internal edges. This will hide the applied glue marks.
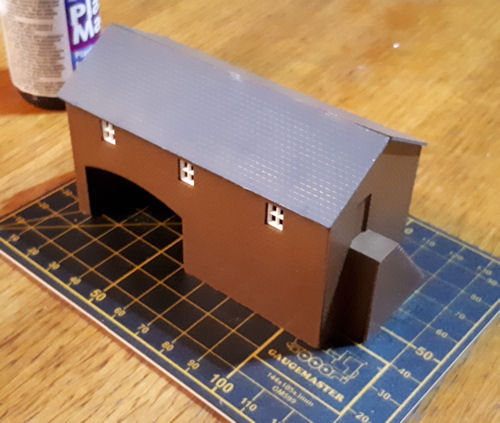
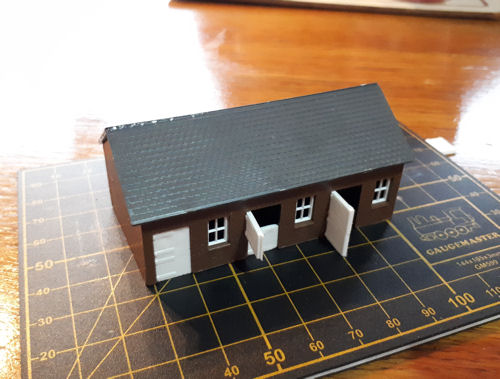
The roof can now be added and then you will have completed three out of four buildings in this pack.
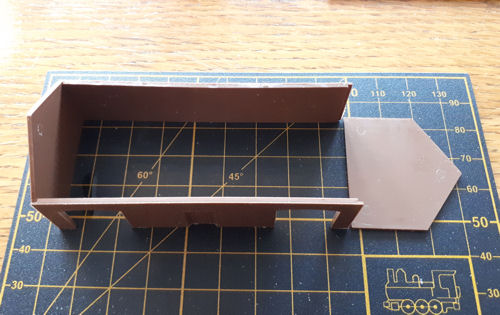
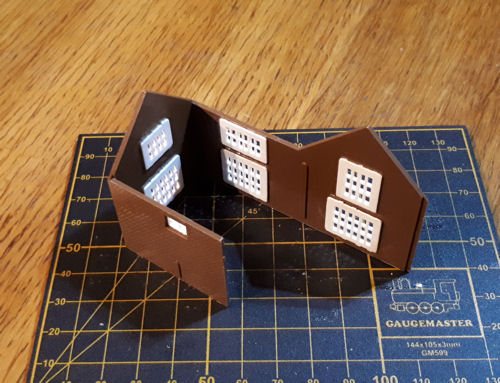
Now we can focus on the farm house which is the more challenging kit in this pack but with a little patience and care it fits together quite easily.
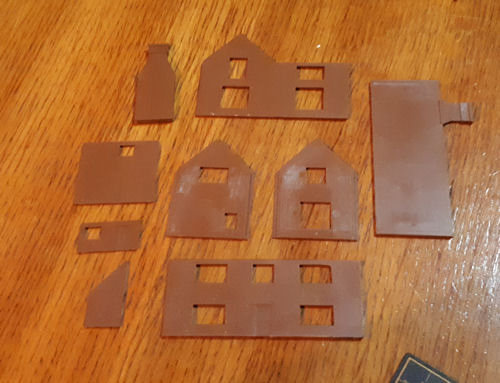
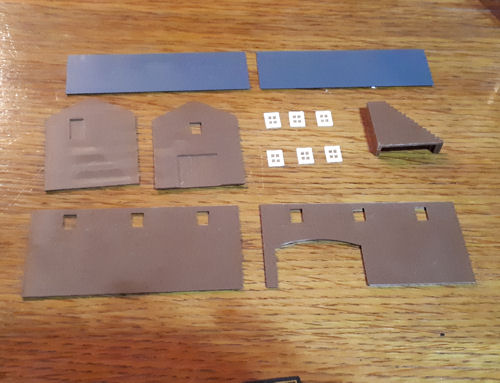
Start by cutting out and preparing all the brown sections as these are the walls, It would be wise to find all the correct windows and glue them in place as it will be very difficult to add them later. Locate an apex section of wall and a short side wall and glue them together, next locate and the part of the wall that has a apex and a short wall attached. Glue this to the apex section and create the side wall.
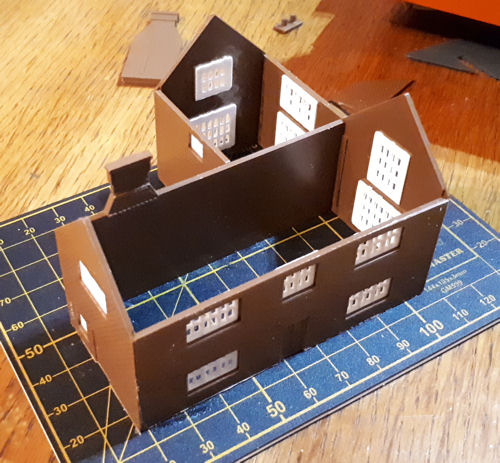
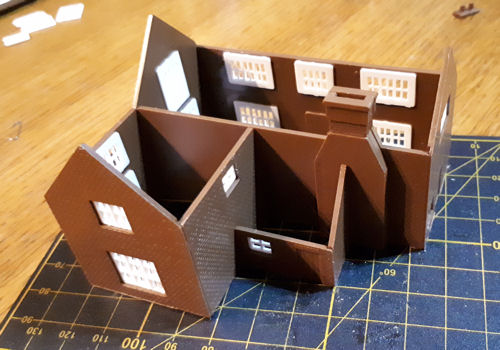
Locate the smooth section of wall which has a chimney stack attached and glue this to the interior wall. You will see locating sections on the interior wall to help position the walls in the correct place, add some glue to these and press the wall sections together. Add the last two sections of wall to the structure to create the main shell, you will now be able to add the chimney section and small walls to form the entrance to the building.
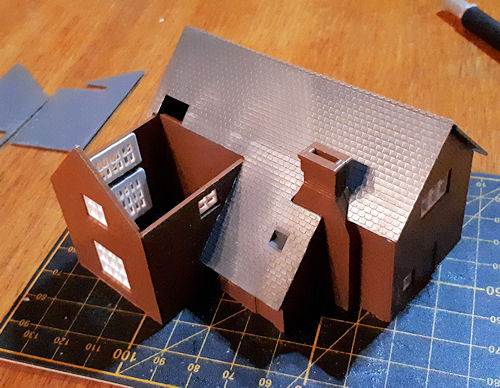
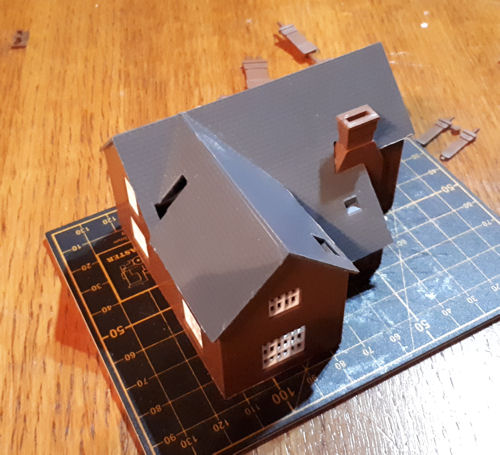
The roof sections can now be added to the top of the structure starting with the back roof, the front roof section can be glued in place which gives you most the location of the chimneys. After the last section of roof is added the chimneys can be placed and glued in.
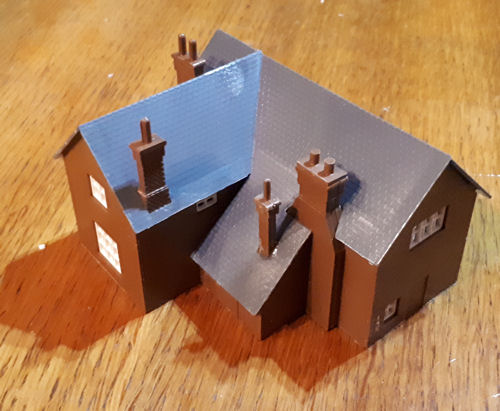
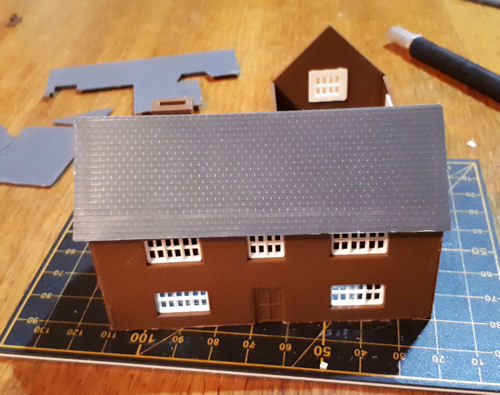
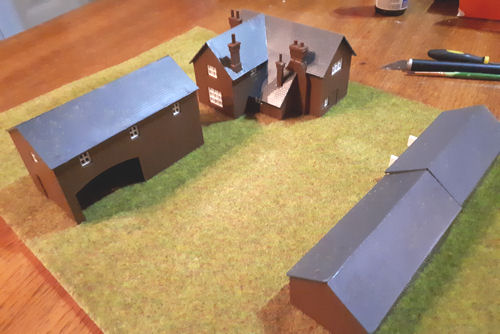
Once the glue is dry you have completed all four buildings ready for placing on the layout.
A quick example of how these buildings can be placed on a farm scene.
1. Start by locating a small patch of grass matting, I used GM22 Autumn Grass.
2. Place the buildings in the desired locations.
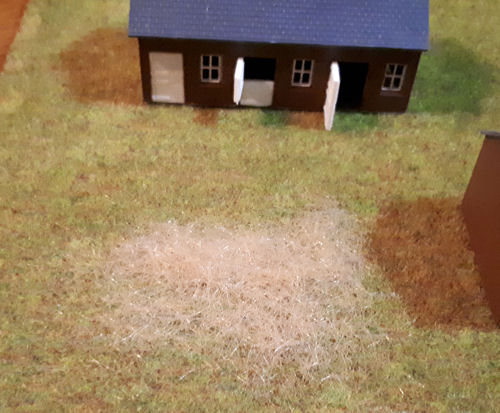
3. Add some beige fine wild grass to where the stable is to be placed, this gives the look of hay in the stable.
4. The addition of a couple of vehicles, a few figures and some animals enhances the scene further and gives it life.

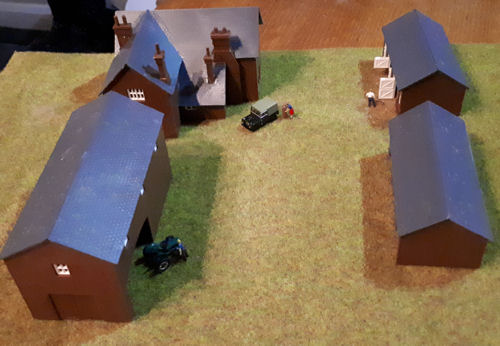
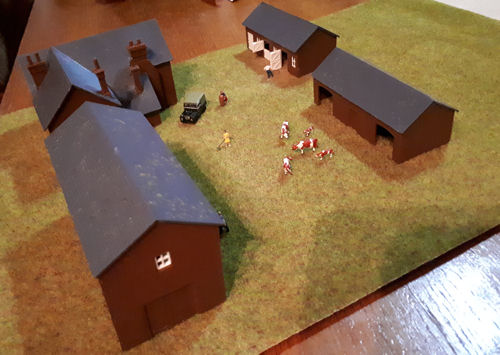
The figures used on this diorama are made by model power because they are cheap, ready painted and can be easily used on all sorts of scenes. The vehicles used are from the Oxford Diecast range.
|


We are always looking to make improvements to our website to try and improve the quality of your visit. We would welcome your feedback and suggestions, so please do not hesitate to e-mail our webmaster with your comments. Alternatively call us on 01903 884488.
Home Cookies Privacy Statement Terms & Conditions Site Map Site Guide
WEEE Regulations Glossary Careers & Jobs
Tel – +44 (0) 1903 884488 Fax – +44 (0) 1903 884377 E-Mail us – click here
Gaugemaster.com is a trading name of Gaugemaster Controls Ltd.
Registered in England No. 2714470, Registered office:
Gaugemaster House, Ford Road
Arundel, West Sussex, BN18 0BN, United Kingdom
VAT Reg. No. 587 8089 71
Copyright © 2003-2014 Gaugemaster Controls Ltd. All Rights Reserved.