|
| OO Scale | N Scale | G Scale | Z Scale | HO Scale | Slot Cars & R⁄C |
| |||||||
|
|||||||
| Home Page | |||||||
| BUY GIFT VOUCHERS | |||||||
| Products | |||||||
| Latest News | |||||||
| RIGHT LINES | |||||||
| Bargains | |||||||
| Downloads | |||||||
| Events | |||||||
| Careers & Jobs | |||||||
| Carriage Services | |||||||
| About Us | |||||||
| Contact Us | |||||||
| Pay Us A Visit | |||||||
| Meet The Staff | |||||||
| Links | |||||||

| SHOPPING BASKET |
Your shopping basket is empty. To add an item, click the "Buy" button
| YOUR ACCOUNT | ||
|
||||
 |
||||
| Prodigy Advance Digital System |
||||
| Cased Controllers |
||||
| Panel Mount Controllers |
||||
| Walkabout Controllers |
||||
| Modules & Transformers |
||||
| Scenics & Accessories |
||||
| Wiring & Electrical Components |
||||
| Tiny Signs | ||||
| Tools | ||||
 |
||||
| RECENTLY VIEWED |
| OD76RRS003 - Range Rover Sport SVR Firenze Red | ||
| GF42-146 - Scenecraft Highley Station Yard Crane (Pre-Built) | ||
| B36-081 - Cows (7) Figure Set | ||
| PK62228 - Red River Station Kit | ||
| ODNFT034 - Ford Transit MkV Van Parcelforce | ||
| More ›› |
| O Scale | Wargaming | Architectural | Narrow Gauge | Tools+ | ||
Programming Locomotive Addresses with Prodigy

GREG SPEARS explains how to programme locomotive addresses using the Gaugemaster Prodigy DCC system.
One question we get asked a lot is how to program an address on a Prodigy controller. The good news is that it's not difficult, so we are going to run through it for reference.
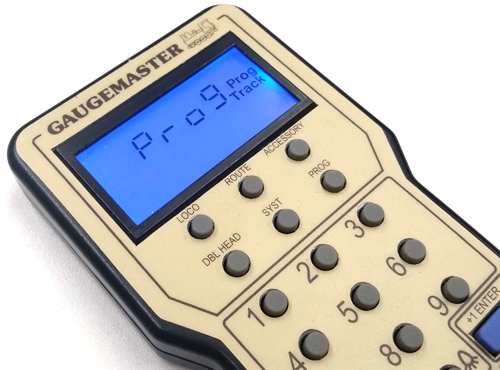
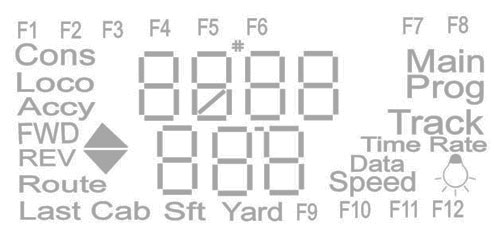
With the exceptions of earlier (obsolete) versions there are three different Prodigy controllers: DCC01 Express, DCC02 Advance, and DCC04 Wireless Advance. All of these controllers use the same display and procedure for programming - they only vary in how the buttons are located, below is a picture of the LCD display with all the available cells filled in.
The Prodigy can program an address on both the Main Track (the layout itself) or a Programming Track (a separate length of track connected to the Programming Track output on the back of the Prodigy), depending on your particular setup. The outputs on the base unit are labelled as such - Please Note: It is important that you do not put a power feed to a Programming Track, as this may damage the decoder and/or the Prodigy main unit irreparably.
To program on the Main Track you must know the decoders current address and that it will accept this style of addressing - some decoders are blocked to avoid accidental address programming, look in the decoder instructions to make sure. By pressing the 'PROG' button on your controller multiple times the display will cycle through:
'Programming on Prog Track'
'Main Track'
'READ'
'Consist for Express Units'
If you miss your stop simply keep pressing and go around again.
If you have selected to program on the Main Track then the display will show this:
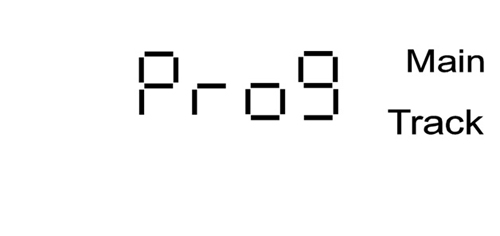
Press ENTER the display now prompts you for the current loco address:
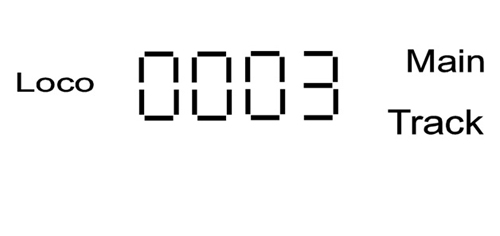
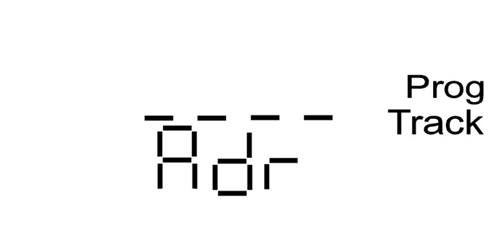
If the address is not displayed on the screen, key it in and press ENTER and 'ADr' will appear. From here both styles of programming are the same but we will be using Programming Track in the pictures.
Programming on the dedicated Programming Track will be appear like this:

So as before simply press ENTER to get to 'ADr':
If your decoder supports 4 digit long addresses, and is regarded as an 'Advance' decoder you can simply key in the desired address and press ENTER. The controller will display 'SEND' on the screen and that's it. For reference the controller will always then move to the next programming option running through e.g. SV-Acc-dEc-Tv-Cv#. You do NOT need to key in any values unless you want to - just simply keep pressing ENTER until you get back to your Loco screen or press RECALL.
Tip: RECALL is like pressing Esc on a computer and will always take you back to the Loco screen when in any mode, or scroll through you Loco list if you're already on it.
So for those who have Advance decoders, job done. For those with older style decoders, read on.
Older style decoders simply don't respond to Advance programming because something is out of its range. For instance a long address requires multiple CV changes, and as the decoder cannot respond to all these it simply ignores them giving the impression the controller is not working.
So always check the decoder instructions to see the minimum and maximum setting of CV1, if its 1-9999 it can take a long address and will most likely work as an ADr modification, but if this range is 1-127 it will only take a short address, and will best respond as a CV (Configuration Variable) change.
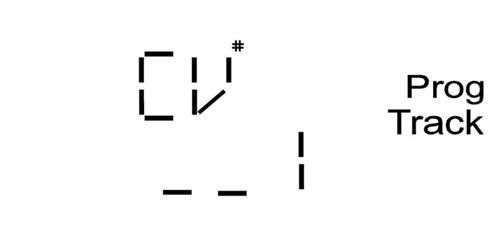
Once in your desired programming method, keep pressing the ENTER key until you reach 'CV#':

Key in number '1' which selects the specific CV that controls the address value:
And then press ENTER, the screen will now display the below:
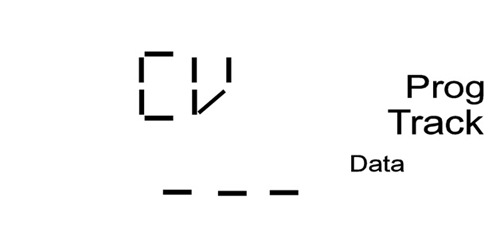
Key in you desired address (1-127) and pres ENTER to SEND, I have used 66 as an example here:
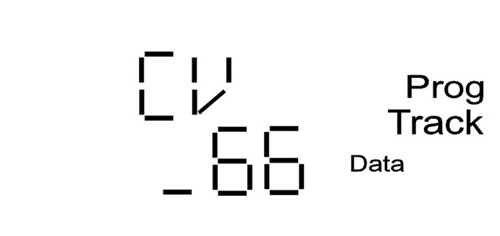

The screen reverts to CV programming, so press ENTER or RECALL to get back to the Loco screen if nothing more is required.
One feature of using a Programming Track is that it is possible to READ a loco address providing the decoder is readable. if you need to READ an address remember a Prodigy Advance handset will REAd as an ADr, or alternatively as CV1. To jump from ADr to CV# in READ mode you need to press the SHIFT button to step through the options and not the ENTER key.
That's all for this time, hopefully in the future we can look at further ways that you can get the most out of your Prodigy system.
|


We are always looking to make improvements to our website to try and improve the quality of your visit. We would welcome your feedback and suggestions, so please do not hesitate to e-mail our webmaster with your comments. Alternatively call us on 01903 884488.
Home Cookies Privacy Statement Terms & Conditions Site Map Site Guide
WEEE Regulations Glossary Careers & Jobs
Tel – +44 (0) 1903 884488 Fax – +44 (0) 1903 884377 E-Mail us – click here
Gaugemaster.com is a trading name of Gaugemaster Controls Ltd.
Registered in England No. 2714470, Registered office:
Gaugemaster House, Ford Road
Arundel, West Sussex, BN18 0BN, United Kingdom
VAT Reg. No. 587 8089 71
Copyright © 2003-2014 Gaugemaster Controls Ltd. All Rights Reserved.