|
| OO Scale | N Scale | G Scale | Z Scale | HO Scale | Slot Cars & R⁄C |
| |||||||
|
|||||||
| Home Page | |||||||
| BUY GIFT VOUCHERS | |||||||
| Products | |||||||
| Latest News | |||||||
| RIGHT LINES | |||||||
| Bargains | |||||||
| Downloads | |||||||
| Events | |||||||
| Careers & Jobs | |||||||
| Carriage Services | |||||||
| About Us | |||||||
| Contact Us | |||||||
| Pay Us A Visit | |||||||
| Meet The Staff | |||||||
| Links | |||||||

| SHOPPING BASKET |
Your shopping basket is empty. To add an item, click the "Buy" button
| YOUR ACCOUNT | ||
|
||||
 |
||||
| Prodigy Advance Digital System |
||||
| Cased Controllers |
||||
| Panel Mount Controllers |
||||
| Walkabout Controllers |
||||
| Modules & Transformers |
||||
| Scenics & Accessories |
||||
| Wiring & Electrical Components |
||||
| Tiny Signs | ||||
| Tools | ||||
 |
||||
| O Scale | Wargaming | Architectural | Narrow Gauge | Tools+ | ||

Dapol Semaphore Signals

MATT LOVELL looks at this range of operating signals from Dapol.
In earlier issues we have looked at both DC and DCC colour light signals by Train Tech. In this article we will be concentrating on a more nostalgic design, the Semaphore.
A Brief History:
The semaphore signal has been around since the early 1840s and was patented by Joseph James Stevens. Although most of them have been replaced by colour light signals there are still lots of areas in the UK which still rely on them. Europe and the USA also used a semaphore signal system.
Semaphore signals use a metal or wooden arm (blade) which operates up and down on a pole. Attached to this arm are red and green spectacle plates which with the aid of bulb illuminate either Red or Green to oncoming trains.
Different Styles of Semaphore:
There are many different styles of semaphore signals and depending on where you live you would see either:
Upper quadrant (Arm moves up to show line clear and centre for stop)
Lower quadrant (Arm moves to centre to show line clear and down for stop)
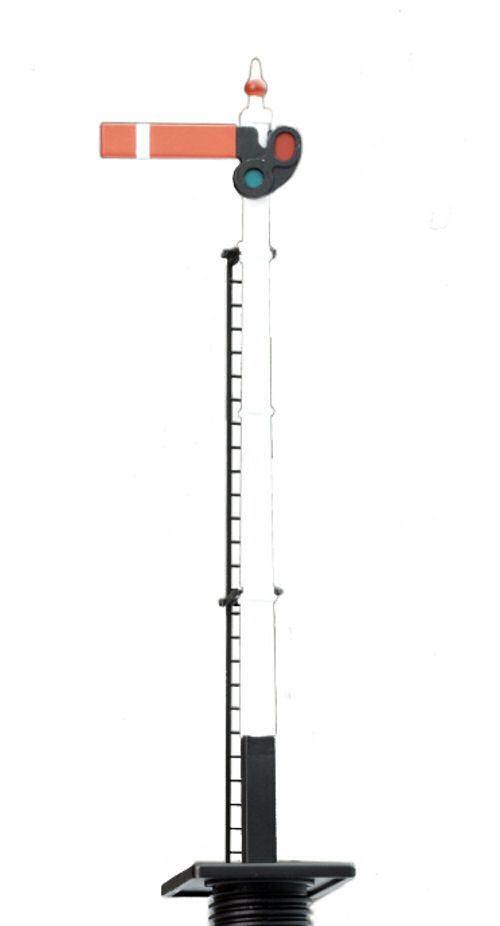
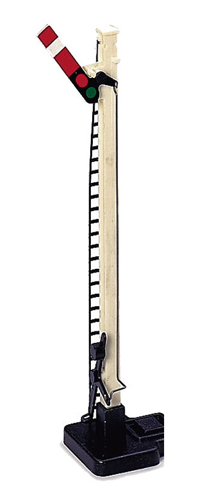
Home Signal (Red arm with white band)
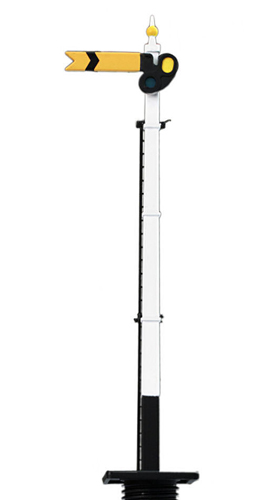
Or Distant Signal. (Yellow arm with black band)
There are also signals dedicated to platform use, these are called starter signals.
Uses of Semaphore Signals
Along any mainline or branch line there are signals positioned in specific locations to control traffic and to ensure that trains do not enter the same section of track which could cause collisions. The main two signals used are the distant and home signals. These two signals are linked to ensure that if the home signal is clear (Green) then the distant signal will show clear (Green). However if the home signal shows stop (Red) then the distant signal will need to show caution (Yellow).
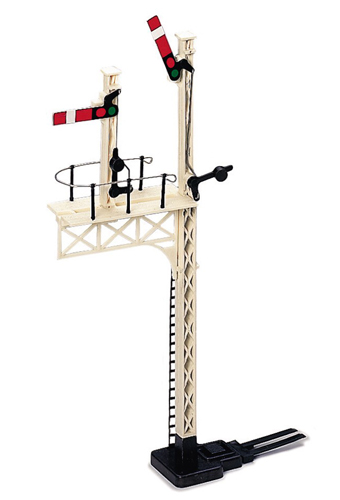
Semaphore signals were also used at junctions to give indication on clear routes ahead. These signals work the same way as single signals just attached to a bracket.
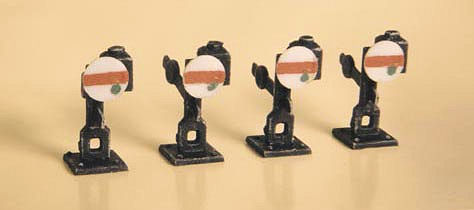
Smaller signals were used in goods yards and depots. As there is not a lot of room in a yard for full size signals ground signals were created to save space but still allow for full operation.
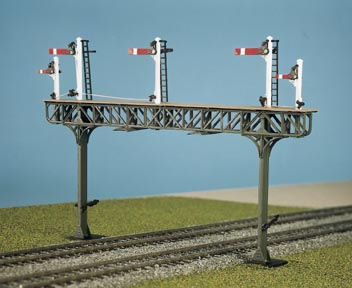
For large stations multiple signals are to control many tracks at once, so rather than have lots of single signals dotted around gantries were constructed to span across the tracks with the relevant signal placed above the track so the driver could just look up at them.
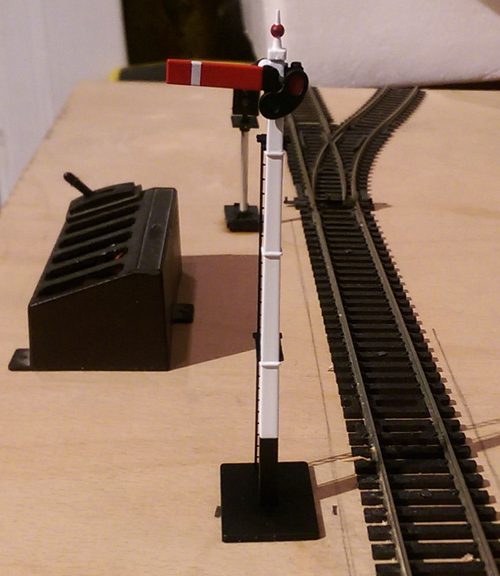
Dapol Semaphore Signals
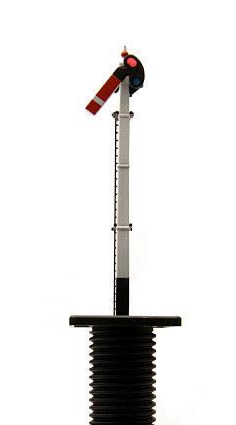
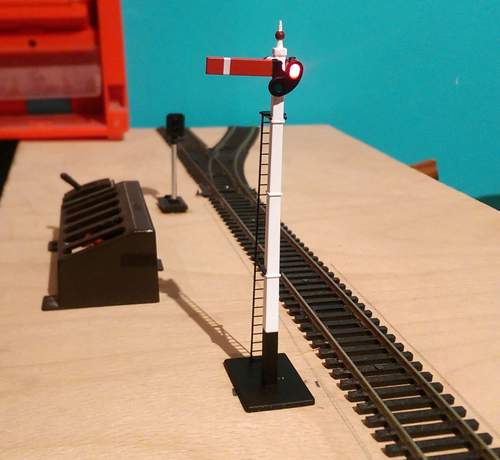
The main focus of this article is how to install a semaphore signal onto the model railway. Dapol produce some nice scale semaphore signals in various styles. I will be using the GWR lower quadrant signal (4L-001-001).
Step 1: Installation
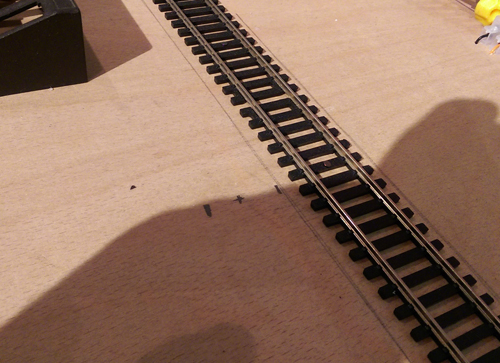
Firstly, measure out where you want the signal to go. Take care when doing this as too far away from the track and the signal will look out of place and too close will cause the train to hit it on the way past.
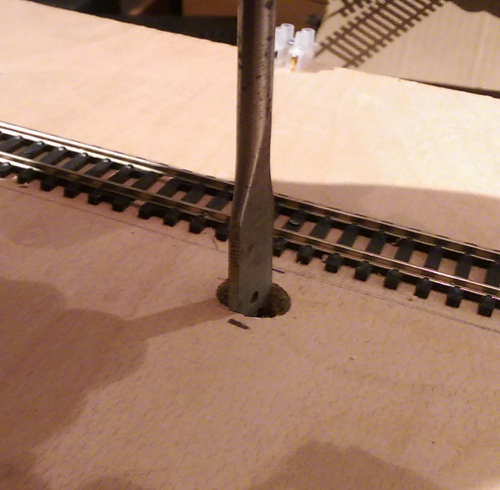
Next, using a set of callipers or a ruler measure the diameter of the solenoid and use a suitable size spade drill bit to cut the hole. For this signal I used a 14mm spade bit which seemed to work nicely.
The solenoid is threaded and includes a nut to secure the signal to the board; I found that using a spacer between the nut and the bottom of the board aids the security to the board.
Step 2: Wiring
On the bottom of the signal there are four wires (two yellows, one red and one black). The red and black are the power to the signal, and the yellow wires are the switch wires which we will look at later on.
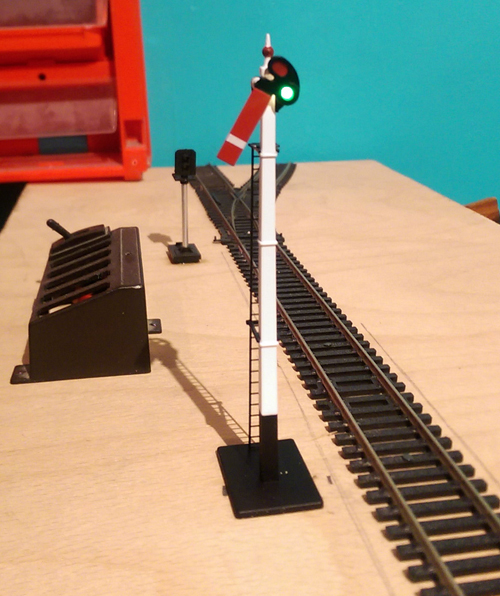
Connect the Red and black wires to a 12v Regulated DC power supply. This will illuminate the LED behind the spectacle plates on the signal arm.
Step 3: Switching
Now we can look at how to operate the signal. The signal relies on a momentary contact so you will need to use a switch system that does not stay on, otherwise you will burn out the solenoid. You can use lots of different types of switches including push to make, sprung centre off, stud and probe and even reed switches with magnets.
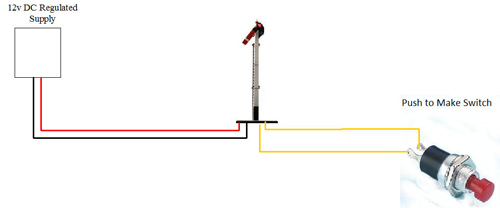
For the first test I have used a push to make switch. Connect a yellow wire to each side of the switch, then just press the button to operate the signal.

The next method of switching I will look at is a sprung centre off system. Connect one yellow wire to the centre contact on the switch and then connect the other yellow wire to one of the outside contacts. You can bridge the two outside contacts together if you want so that it doesnt matter which way you throw the switch.
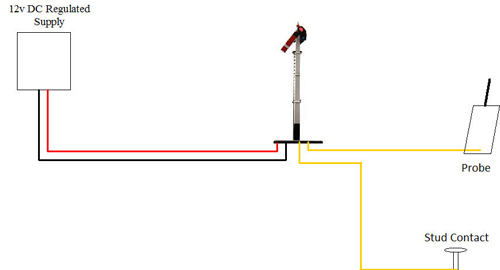
The third method I will look at is a popular system for any modeller constructing a control panel - Stud and Probe. All you need to do is connect one of the yellow wires to a stud and the other one to a probe. To operate the signal simply touch the stud with the probe. You only need one stud as the signal operates in both directions using the yellow wires.
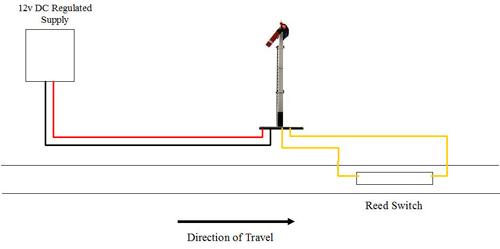
Lastly, and perhaps the most realistic method that I will show you, is the reed switch and magnet system. This system works automatically, install a reed switch on the layout just before the signal and connect the two yellow wires to that reed. Next attach a magnet to a wagon (the brake van preferably) and as the magnet passes over the reed switch the circuit will be completed and the signal will operate.
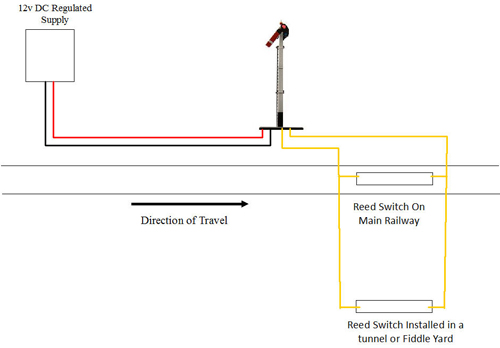
With this method you can install a second reed switch in a tunnel or fiddle yard to reset the signal to clear once the locomotive has cleared the section.
You can also use the Train Tech Semaphore controller to switch these signals on a DCC system. Hopefully this has been a useful series of articles showing you how to add an extra dimension of movement to your layout.
|


We are always looking to make improvements to our website to try and improve the quality of your visit. We would welcome your feedback and suggestions, so please do not hesitate to e-mail our webmaster with your comments. Alternatively call us on 01903 884488.
Home Cookies Privacy Statement Terms & Conditions Site Map Site Guide
WEEE Regulations Glossary Careers & Jobs
Tel – +44 (0) 1903 884488 Fax – +44 (0) 1903 884377 E-Mail us – click here
Gaugemaster.com is a trading name of Gaugemaster Controls Ltd.
Registered in England No. 2714470, Registered office:
Gaugemaster House, Ford Road
Arundel, West Sussex, BN18 0BN, United Kingdom
VAT Reg. No. 587 8089 71
Copyright © 2003-2014 Gaugemaster Controls Ltd. All Rights Reserved.