|
| OO Scale | N Scale | G Scale | Z Scale | HO Scale | Slot Cars & R⁄C |
| |||||||
|
|||||||
| Home Page | |||||||
| BUY GIFT VOUCHERS | |||||||
| Products | |||||||
| Latest News | |||||||
| RIGHT LINES | |||||||
| Bargains | |||||||
| Downloads | |||||||
| Events | |||||||
| Careers & Jobs | |||||||
| Carriage Services | |||||||
| About Us | |||||||
| Contact Us | |||||||
| Pay Us A Visit | |||||||
| Meet The Staff | |||||||
| Links | |||||||

| SHOPPING BASKET |
Your shopping basket is empty. To add an item, click the "Buy" button
| YOUR ACCOUNT | ||
|
||||
 |
||||
| Prodigy Advance Digital System |
||||
| Cased Controllers |
||||
| Panel Mount Controllers |
||||
| Walkabout Controllers |
||||
| Modules & Transformers |
||||
| Scenics & Accessories |
||||
| Wiring & Electrical Components |
||||
| Tiny Signs | ||||
| Tools | ||||
 |
||||
| O Scale | Wargaming | Architectural | Narrow Gauge | Tools+ | ||
PRODUCT SPOTLIGHT - Gaugemaster Ballasted Underlay

MATT LOVELL explains how to use this underlay range.
Railway modellers are always looking for additional details to add to their railway. One of the most important and realistic details which can be added is the ballast between and around the sleepers. These stones are used to anchor the sleeper in place and form a solid base for the heavy rails.
This detail can easily be modelled in any scale and by using lots of different methods. The easiest and most effective ways is to use our own Ballasted Foam Underlay, and this step by step guide will help transform any piece of track from shop-bought to part of a scenic model railway.
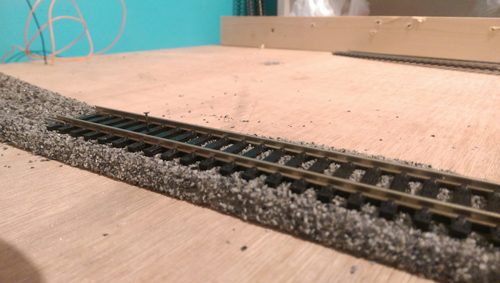
Step 1: Laying the Track
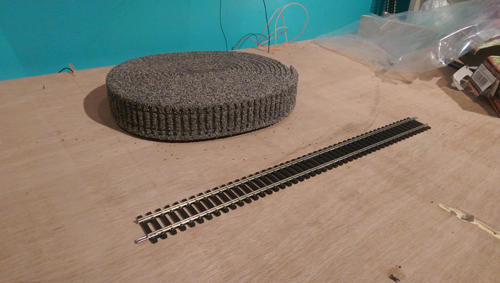
Firstly open the box(I'm using the GM200 Grey Ballasted Underlay for this article) and empty the contents onto your baseboard. The foam contains indented sleeper spacing to allow easy placing of the track to the foam.
Carefully place the track on top of the foam and line up the sleepers with the indentations.
Once you are happy with the foam underlay you can start fixing the foam.
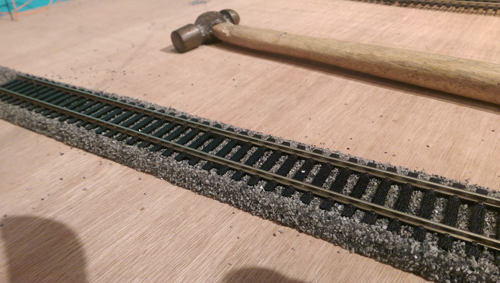
Step 2: Fixing the Foam
While fixing the foam you need to take some care not to use a pin which is too short otherwise you can squash the foam and distort the finish. This could also lead to poor running of your locomotives.
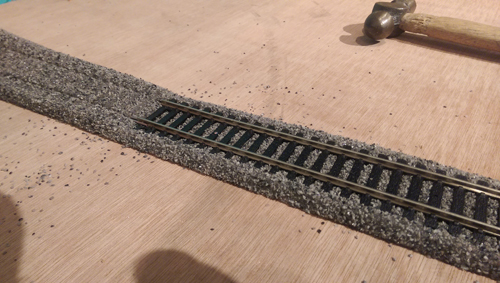
The best pins to use are the GM67 Long Pins as they are long enough to pass through the foam and into the board below without distorting the foam.
Insert the pins into one of the holes in the sleepers using a small pin hammer or Pin Pusher with Depth Stop. The pin should sit on top of the sleeper but not squash the foam below.
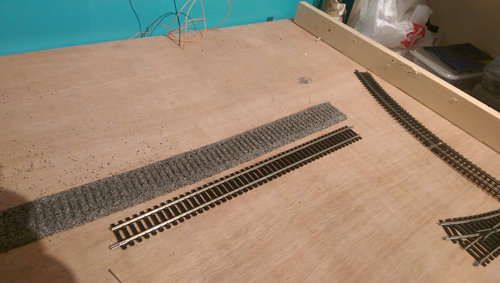
Step 3: Curves
Along with straights this foam can also be used with curves from 1st radius, it is very flexible and with care can be curved easily. Just use the same method stated above.
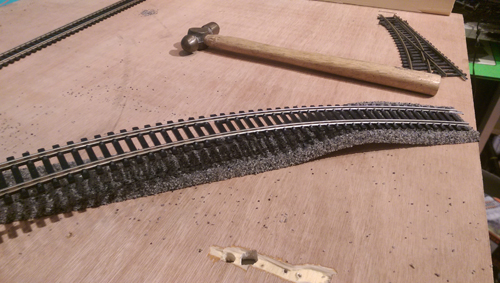
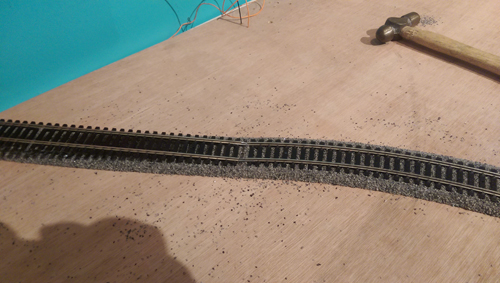
You can now apply these instructions to create an oval of track.
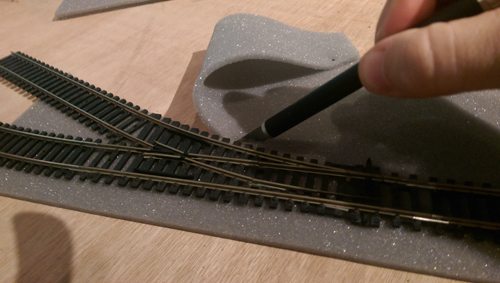
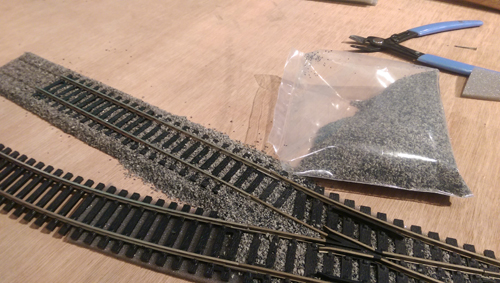
Step 4: Points
This next step will cover the use of the GM204 Points and Crossing Grey Ballasting Kit (also avaiable in Brown). This kit contains three sections of foam and a small bag of ballast in the matching colour and grade for the GM200.
Start by laying the point on top of one of the foam sheets making sure there is sufficient overlap.

Using a sharp scalpel; cut around the point leaving about a 2mm gap between the edge of the foam and the sleepers.
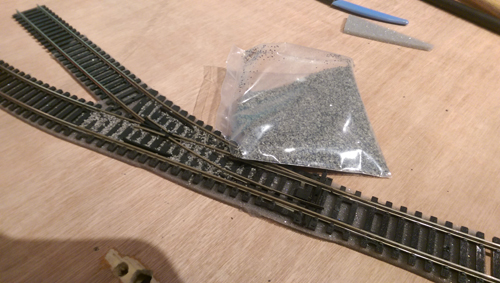
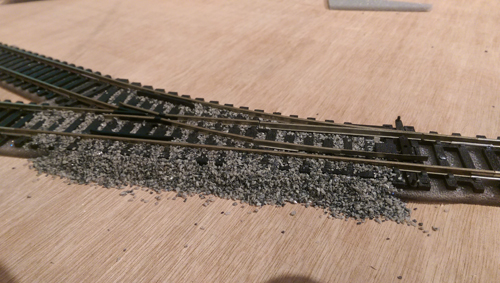
Once you are happy with the position of the foam and point work you can start applying the loose ballast to the point. Cut a small hole in the bag to use as a funnel, use this hole to pour out the ballast onto the sleepers of the point.
This same method can be used on the ballast shoulder. The ballast can be glued down using the Deluxe Materials Ballast Bond or Ballast Magic adhesives.
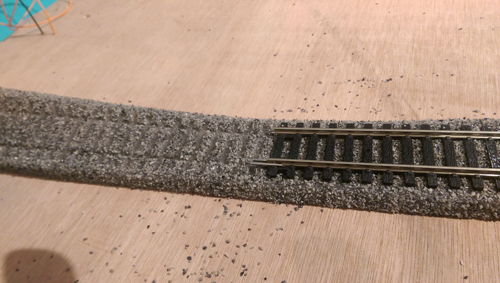
Step 5: Combining the GM200 Underlay with the GM204 Crossing Kit
The last part of this instruction combines both parts of the ballasted underlay together. Start by using the method in Step 4 and when the tail end of the point comes off insert a section of the GM204 foam sheet underneath the straight sections. Then depending on how long you want the siding or junction you can add a section of the GM200 after the point.
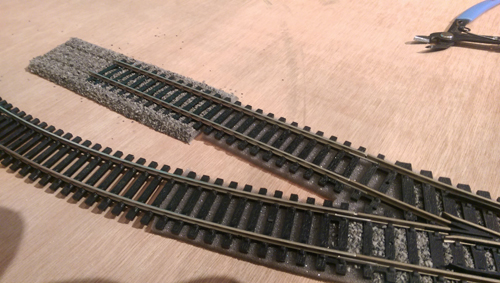
Using the loose ballast in the GM204 you can blend the straights together forming an invisible seam. Again the loose ballast can be glued down.
The Gaugemaster range of Ballast Underlay is available in both Grey and Brown variants and is also available in both OO/HO and N Scale.
GM200 OO/HO Flexible Grey Ballasted Underlay
GM201 N Flexible Grey Ballasted Underlay
GM204 OO/HO Point & Crossing Grey Ballasted Underlay Kit
GM205 N Point & Crossing Grey Ballasted Underlay Kit
GM210 OO/HO Brown Flexible Ballasted Underlay
GM211 N Brown Flexible Ballasted Underlay
|


We are always looking to make improvements to our website to try and improve the quality of your visit. We would welcome your feedback and suggestions, so please do not hesitate to e-mail our webmaster with your comments. Alternatively call us on 01903 884488.
Home Cookies Privacy Statement Terms & Conditions Site Map Site Guide
WEEE Regulations Glossary Careers & Jobs
Tel – +44 (0) 1903 884488 Fax – +44 (0) 1903 884377 E-Mail us – click here
Gaugemaster.com is a trading name of Gaugemaster Controls Ltd.
Registered in England No. 2714470, Registered office:
Gaugemaster House, Ford Road
Arundel, West Sussex, BN18 0BN, United Kingdom
VAT Reg. No. 587 8089 71
Copyright © 2003-2014 Gaugemaster Controls Ltd. All Rights Reserved.