|
| OO Scale | N Scale | G Scale | Z Scale | HO Scale | Slot Cars & R⁄C |
| |||||||
|
|||||||
| Home Page | |||||||
| BUY GIFT VOUCHERS | |||||||
| Products | |||||||
| Latest News | |||||||
| RIGHT LINES | |||||||
| Bargains | |||||||
| Downloads | |||||||
| Events | |||||||
| Careers & Jobs | |||||||
| Carriage Services | |||||||
| About Us | |||||||
| Contact Us | |||||||
| Pay Us A Visit | |||||||
| Meet The Staff | |||||||
| Links | |||||||

| SHOPPING BASKET |
Your shopping basket is empty. To add an item, click the "Buy" button
| YOUR ACCOUNT | ||
|
||||
 |
||||
| Prodigy Advance Digital System |
||||
| Cased Controllers |
||||
| Panel Mount Controllers |
||||
| Walkabout Controllers |
||||
| Modules & Transformers |
||||
| Scenics & Accessories |
||||
| Wiring & Electrical Components |
||||
| Tiny Signs | ||||
| Tools | ||||
 |
||||
| RECENTLY VIEWED |
| MODELSTRIP - Use GM08 |
| O Scale | Wargaming | Architectural | Narrow Gauge | Tools+ | ||

Howzat!
A Cricket Pavilion - Or Not

MARK HOLLAND shows us how to repurpose this Peco kit.
As with many scenery choices on model railways, sometimes you need to get a bit imaginative when using available items to get exactly what you want. We were looking for a small building to be used as the reception/site office for a campsite entrance on our OO Scale shop layout and the Model Scene pavilion offered an attractive option, all be it after a little bit of modification.
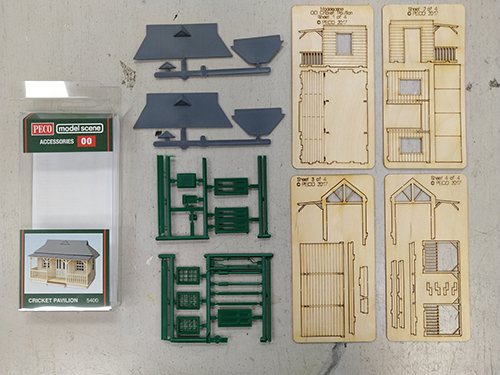
The PECO Model Scene Cricket Pavilion kit is what is called 'mixed media', meaning more than one type of material used in its parts. In the case of this kit, plastic and laser cut wood.
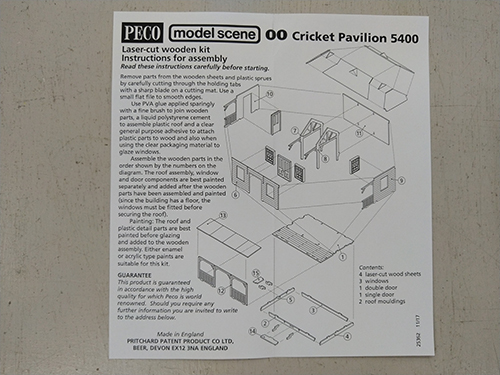
I've included this picture of the instructions to show the construction of the pavilion as I didn't take any photos in the early stages due to lack of available hands! The laser cut wood fits together nicely and with the use of a good quality PVA glue such as Deluxe Materials Speed Bond and some elastic bands, it went together in no time.
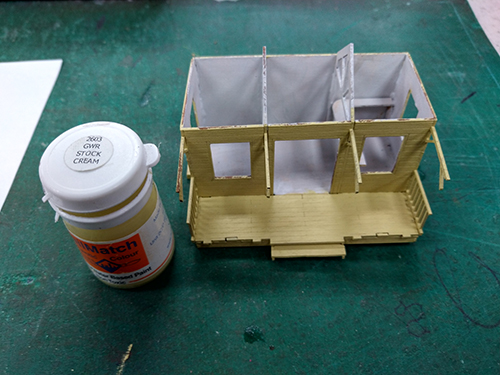
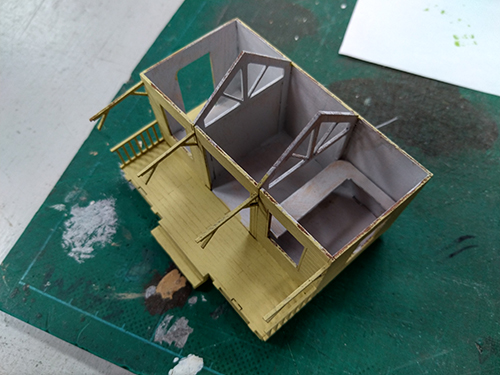
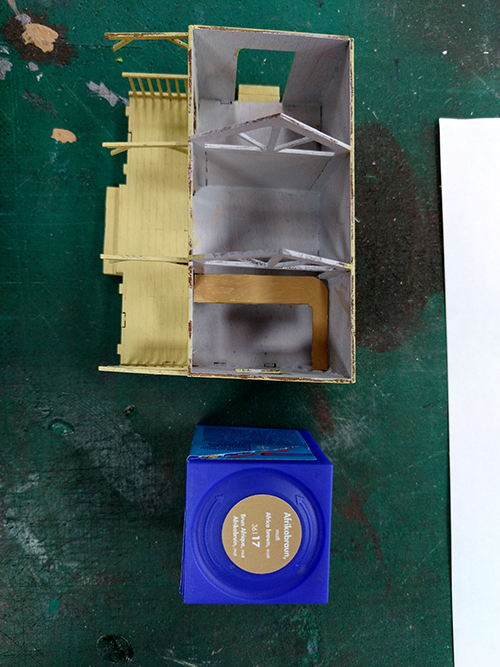
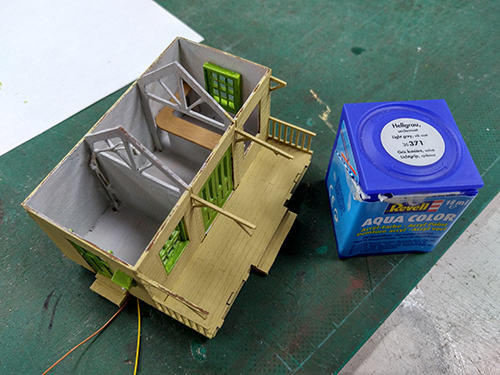
Once the glue was fully dried, I moved on to painting the basic colours. I settled on a GWR cream for the outside and a light grey for the interior. There is no need to paint this kit unless you want to, as the laser cut wood naturally gives a very nice effect, although I felt it still looked too much like a cricket pavilion when left unpainted.
As the use of the building was changing, a little bit of modification was required on the interior. Using some of the excess wood from the laser cut sprues (never throw anything away!), a booking in counter was cut from one of the sprue corners and a dividing wall fitted. The dividing wall was the easiest as there is exactly the right piece to fit between the uprights left as waste on the sprue.
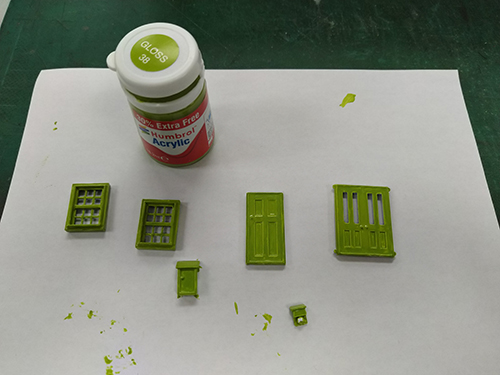
A quick paint of the countertop in an appropriately woody colour and it's on to painting the doors and windows. It isn't necessary to paint the windows and doors, but I felt a change of colour to suit the buildings new purpose was in order. I would recommend undercoating the plastic as this will make the new paint adhere much better.
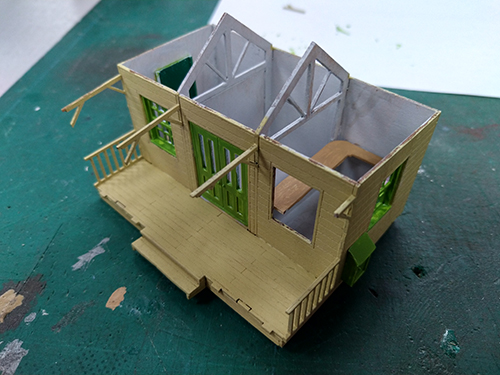
Once the paint is dry the windows and doors are a simple matter to fit, a small spread of super glue around the frames and they are pushed into place from the inside and locate very nicely.
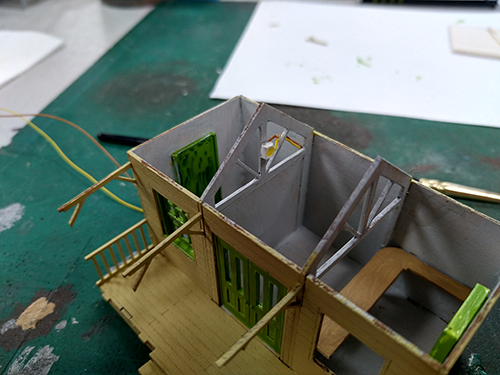
As an interior was planed for the building, adding a small light inside seemed a good idea. After removing the surround from a Viessmann LED, it was glued onto a roof truss and the wires were routed down into the corner of what will become the office. The wires where passed out through the bottom of the building via a small hole in the floor. A few dots of super glue to hold the wires in place and a coat of the same paint as the interior to help disguise them.
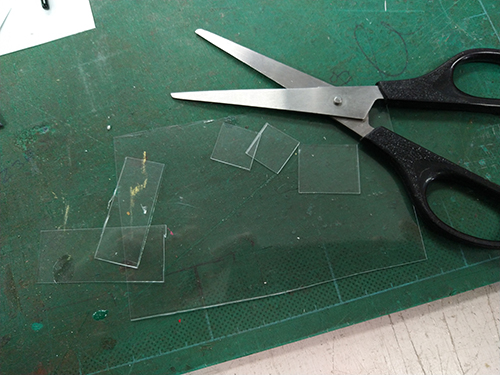
The windows frames in the kit don't have any glazing to go in them, so it's a simple matter to take a pair of scissors to the box the kit came in and cut out some small sections. Don't throw the rest away as there is plenty left over to do windows on other kits! To stick it onto the inside of the windows and front door I used PVA as I was unsure how the clear plastic would react to any other types of glue and didn't want it to fog up.
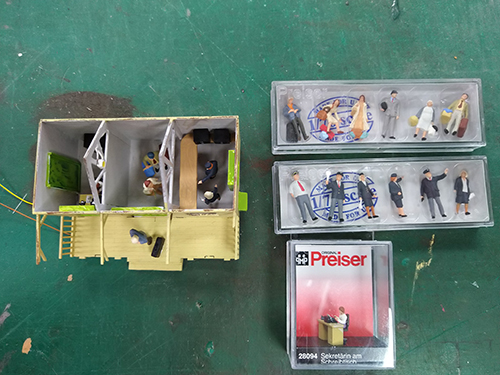
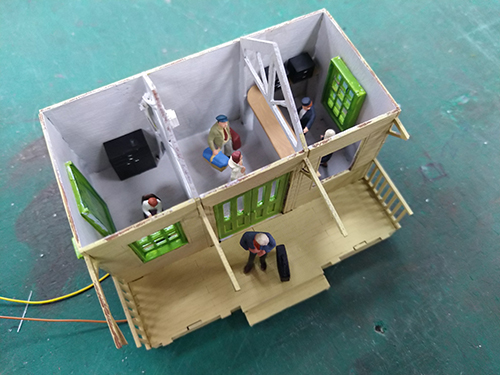
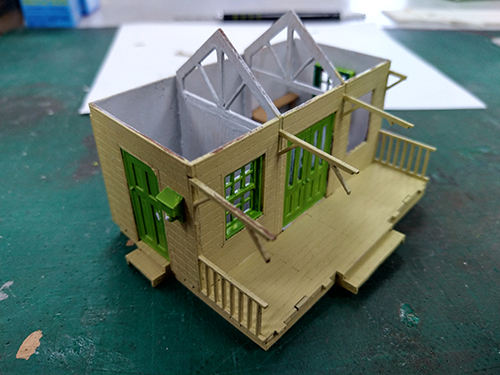
Once all paint and glue had been left to dry sufficiently its time to populate the interior. I used a selection of figures from several packs of Preiser 1:76/OO figures, including a lady at her desk. For interior work such as building or coaches it's not really a worry if the figures are OO or HO, sometimes HO is the better option if space is an issue. All the figures were fixed down using superglue as this was the quickest method of fixing them in the correct positions.
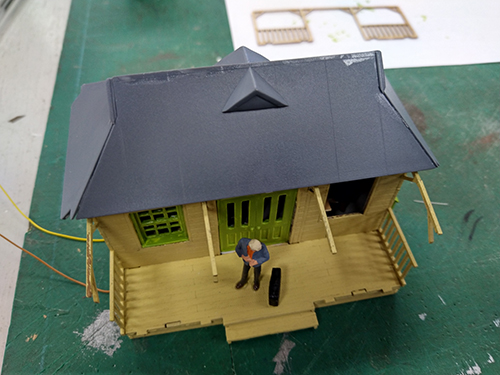
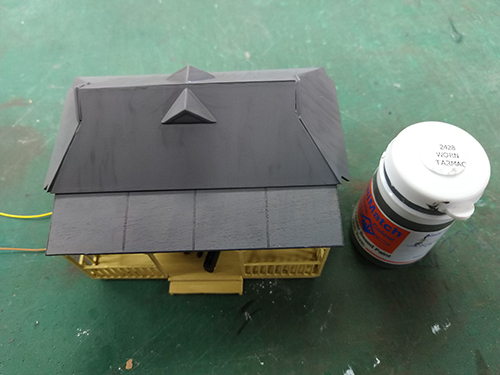
The main roof is made from a dark grey plastic and the veranda roof is a laser cut wood part. As such both will require painting to make them match each other. I used a worn tarmac colour as the roof is to look felt covered, this colour or a something for painting car tyres such as a worn rubber etc, would do just as well.

All finished, with the front veranda railing in place and the campsite sign fitted onto the front wall, and a little touching up on the paint work. Now I just need to route the wiring for power to the interior light and lay the paths and grass around it, but that's for another time!
All in all a very nice kit from PECO Model Scene, it goes together quickly and accurately. Perfect to use as the intended cricket pavilion or as a re-purposed building.
Items Used
AXB0038EP Humbrol Acrylic Lime Green Gloss
DLAD-10 Deluxe Materials Speed Bond
DLAD-44 Deluxe Materials Roket Rapid
PE5400 PECO Model Scene Cricket Pavilion
PR28094 Preiser Secretary at Her Desk
PR73001 Preiser Waiting Passengers
PR73005 Preiser British Rail Staff
RL36117 Revell Aqua Colour Africa Brown
RL36371 Revell Aqua Colour Light Grey
|


We are always looking to make improvements to our website to try and improve the quality of your visit. We would welcome your feedback and suggestions, so please do not hesitate to e-mail our webmaster with your comments. Alternatively call us on 01903 884488.
Home Cookies Privacy Statement Terms & Conditions Site Map Site Guide
WEEE Regulations Glossary Careers & Jobs
Tel – +44 (0) 1903 884488 Fax – +44 (0) 1903 884377 E-Mail us – click here
Gaugemaster.com is a trading name of Gaugemaster Controls Ltd.
Registered in England No. 2714470, Registered office:
Gaugemaster House, Ford Road
Arundel, West Sussex, BN18 0BN, United Kingdom
VAT Reg. No. 587 8089 71
Copyright © 2003-2014 Gaugemaster Controls Ltd. All Rights Reserved.