|
| OO Scale | N Scale | G Scale | Z Scale | HO Scale | Slot Cars & R⁄C |
| |||||||
|
|||||||
| Home Page | |||||||
| BUY GIFT VOUCHERS | |||||||
| Products | |||||||
| Latest News | |||||||
| RIGHT LINES | |||||||
| Bargains | |||||||
| Downloads | |||||||
| Events | |||||||
| Careers & Jobs | |||||||
| Carriage Services | |||||||
| About Us | |||||||
| Contact Us | |||||||
| Pay Us A Visit | |||||||
| Meet The Staff | |||||||
| Links | |||||||

| SHOPPING BASKET |
Your shopping basket is empty. To add an item, click the "Buy" button
| YOUR ACCOUNT | ||
|
||||
 |
||||
| Prodigy Advance Digital System |
||||
| Cased Controllers |
||||
| Panel Mount Controllers |
||||
| Walkabout Controllers |
||||
| Modules & Transformers |
||||
| Scenics & Accessories |
||||
| Wiring & Electrical Components |
||||
| Tiny Signs | ||||
| Tools | ||||
 |
||||
| RECENTLY VIEWED |
| MODELSTRIP - Use GM08 |
| O Scale | Wargaming | Architectural | Narrow Gauge | Tools+ | ||
Expanding Your Starter Set

NICK DUXFIELD explains how to expand a starter set into a scenic model railway.
The train set has been bought - ready made buildings and trees laid out, and with the track on the floor or a printed
track mat trains have been run and fun has been had - what next?
This is the moment when boredom may set in, leading to a move to another seemingly less demanding, but certainly less rewarding hobby.
Surely, though, you will want your railway to stand out from the rest for its interest and the obvious skill that has gone into its
making - it is always satisfying to hear positive comment on our efforts.
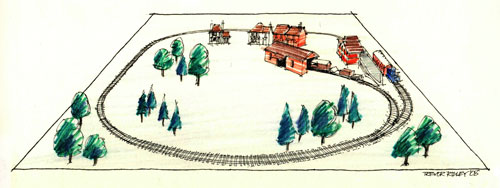
The layout in the sketch above is fine - quick to set up and put away but probably looking much like countless other ‘starter’ layouts. However, a whole range of possibilities for imaginative expansion is opened up if a simple baseboard is made on which to build the railway.
The purpose of this and following articles will be to show you how easy it is to convert your train set into a model railway.
Early Days
The layout in the sketch below has the same basic oval of track, a station with a siding and goods shed plus three or four other buildings. The big difference is discarding the flat effect for one that includes hills and a valley. This in turn means the track has to follow the landscape, curving round hillsides, leaping the valley on a bridge, plunging into a tunnel. This railway is coming to life.
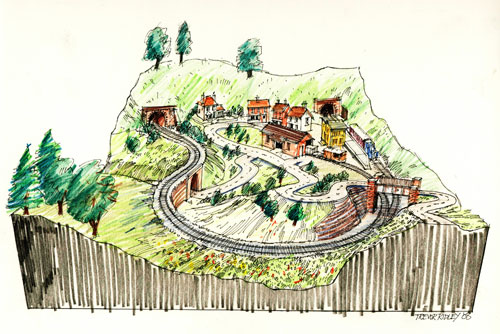
This set-up can easily be expanded with another baseboard joined on at the tunnel end, the track dividing under the hill to emerge onto the second baseboard.
Clearly, building a baseboard is going to involve a bit of carpentry - don't let this put you off - the work is straightforward. Model railway baseboards need win no marks for elegance or approval from a professional woodworker, they simply need to do their job and look reasonably neat and tidy when finished, but we will look at this another time. First you need to have a clear idea of where and when your layout is going to represent. Is it going to be a GWR branchline in OO gauge, or maybe a modern French layout in N gauge with TGVs whizzing about?
Planning
You also need to decide on the type of landscape your railway is to run through, perhaps a rugged landscape of rock and tumbling streams, pine trees, heather and gorse, or the soft red brick, thatch and water meadows of a farmland scene. Away from the countryside you might choose to model a gritty, industrial area with factory buildings, dark with soot from tall chimneys.
If you have room you might include a variety of locations - relive an enjoyable continental holiday with an alpine railway, the range of European rolling stock, buildings and infrastructure is very attractive and there is a huge choice.

Once the type of countryside and townscape has been decided on the routes your railway tracks and roadways will follow need to be plotted along with the position of the hills and valleys with their rough heights and depths. If there is to be a river then it will follow the valley bottoms and if waterfalls are to be featured then appropriate drops must be provided. Canals, on the other hand, take a winding course following the contours of the hills with locks when a change in level becomes necessary.
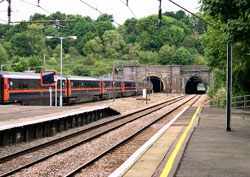
Spend some time visiting stretches of railway in the type of environment that attracts you - take photos of features that you would specially like to recreate in miniature, check out images of the ‘full size’ railway scene in books and magazines. Paintings are a good source of inspiration - artists concentrate on the essential features and exclude elements that might spoil the scene. There is a lot of fun to be had at this stage, let your imagination loose, nothing is to be gained by hurrying.
Branch-line railways, cheaply constructed in real-life, are usually single track, following a winding path around hills, with occasional steep gradients, earthworks and bridges where they are the only alternative.
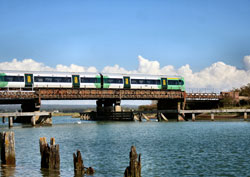
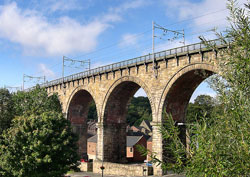
Totally different are mainline railways engineered for high speed running with sweeping curves, deep cuttings, tunnels, viaducts and
high embankments when these are the only solution to achieving a high speed alignment. Motorways, main roads and country lanes
follow a similar logic. Remember that wherever there are buildings there will be a road, lane or track giving access.
Be careful not to have the slope of grass covered cuttings and embankments unrealistically steep. Plan to build in bridges, retaining walls and tunnels where appropriate to add interest to your railway.
Next time we will be looking at layout board construction. This article is adapted from the Gaugemaster Scenic Guide produced back in 2008. Although out of print a PDF copy can be viewed here. Right click on the link and select ‘Save Link As’ to download the Guide rather than open it in your browser.
|


We are always looking to make improvements to our website to try and improve the quality of your visit. We would welcome your feedback and suggestions, so please do not hesitate to e-mail our webmaster with your comments. Alternatively call us on 01903 884488.
Home Cookies Privacy Statement Terms & Conditions Site Map Site Guide
WEEE Regulations Glossary Careers & Jobs
Tel – +44 (0) 1903 884488 Fax – +44 (0) 1903 884377 E-Mail us – click here
Gaugemaster.com is a trading name of Gaugemaster Controls Ltd.
Registered in England No. 2714470, Registered office:
Gaugemaster House, Ford Road
Arundel, West Sussex, BN18 0BN, United Kingdom
VAT Reg. No. 587 8089 71
Copyright © 2003-2014 Gaugemaster Controls Ltd. All Rights Reserved.